After clear
parts were in place, it was time for applying the mesh sheet.
Template is provided, but I cut each mesh by test fitting and
trimming repeatedly. |
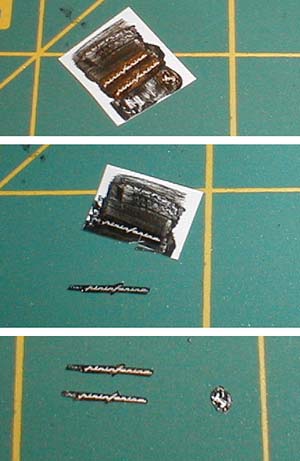
| I thought the badges would look too thin,
if the
decals were applied directly on the body. So, I
applied decals on a painted styrene paper of 0.13 mm
thickness. (top pic.)
Since Revell missed "designo" in front of the
"pininfarina" logo, I scribed it with a sharp knife, and
cut out the whole script.
I did the same for the horse badge on the back.
|
 |
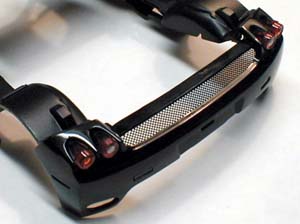
| Although the clear parts fit well, I
applied too much glue, causing a slightly raised left headlight
cover. I sanded the surface with 2000 grit sand paper, and
polished. |
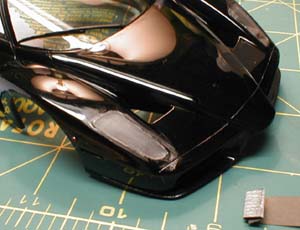 |
| Because the bonding surface was the
black painted area on the clear part, I thought glue would peel the
paint off, and the clear part would come off. Revell omitted
four fastening rivets, so I drilled holes, and inserted 0.5 mm brass
rod for reinforcement, then glued a tiny circle, cut out from a
styrene sheet to hide the holes. |
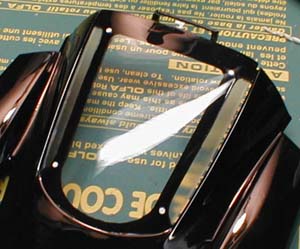 |
Revell included enough size of mesh
sheet. I only used 1/3 of it. The mesh was glued with
Locktite brush on super glue one by one. |
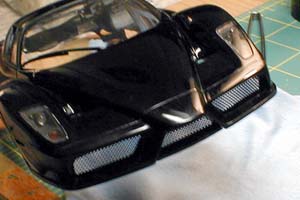 |
| Although Revell provided a complete
template for all the mesh sheets, I cut one side at a time, test
fit, and proceed to the next. |
 |
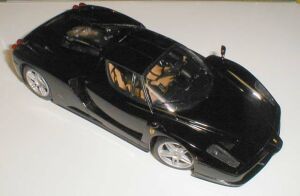
| Finally, the body was glued to the
chassis. I protected the body with Kleenex, and held the body and
chassis with rubber bands. Then liquid glue was flown into the gap
between the contact surfaces. I waited the glue to dry for
overnight, and it took three nights just to glue the body to the
chassis, (back, sides and front.) |
 |
| I cleaned the finger prints left while
gluing the body. Then, I glued the mirrors and applied decals.
|
 |
| More
photos in the Galley page |
|
|
|
 |