|
|
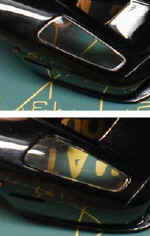
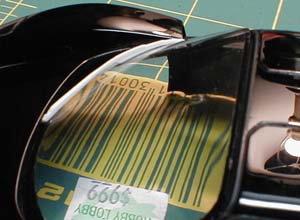
| Here is a little tip of improving the finish
of your model. Instead of gluing clear parts as it is, paint
the surrounding sides black. Above is unpainted side window,
while below is painted one. I did the same on the light cover,
as shown below.
|
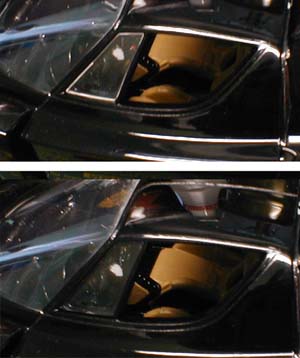 |
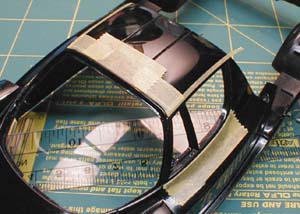
| The window frame was painted black from the
back. I used masking tape for the straight line on the engine
cover, but the rest was free hand. |
 |
| The window frame was also painted by
using a masking tape. I applied the tape roughly, and follow
the groove with tooth pick, so that there's no gap between the tape
and the body. Then, I
cut the tape with a sharp knife and removed the unnecessary
part. I checked for the gap again, then painted the frame flat
black to add a contrast to the glossy black body color. |
 |
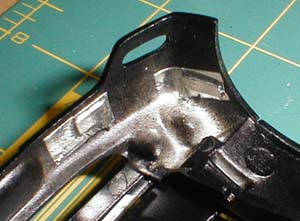
| I test fitted the wiper blade / arm assembly, and
it conformed to the windshield almost perfectly. Another good
attention to the detail, just like Tamiya kit. |
 |
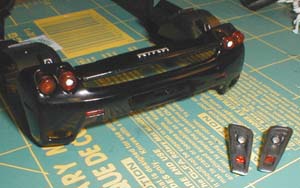
| Side and back marker lights were painted
with Tamiya clear orange and clear red. They were glued to the
body, and the back was covered with BareMetal as shown. |
 |
| The back of the headlight lenses and
turning lights were covered with BareMetal before glued to the
bracket. The tail lights are molded in clear red, so I
applied BareMetal foil in the center, and then, I painted the backup
light in hazy clear white, and turning light in clear orange. |
 |
|
  |
|