|
Usually, I
take 3 steps of body painting after priming. First step is a
base color to make the body color vivid and bright.
Second step is to spray or airbrush the body color, and I usually
sand and smooth sometime in-between at least once. Third stage
is a clear coat to achieve the rich and deep finish. However,
for this model, I chose black for the body color, so I skipped the
base color and the clear coat. |
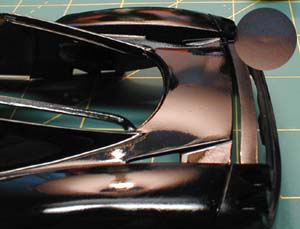
| I applied two layers (6 - 8 passes) of
Tamiya spray gloss black. Then, I realized that there was a
sink mark on the engine cover. It wasn't so deep,
so I smoothed it with a 1500 grit sand paper. |
|
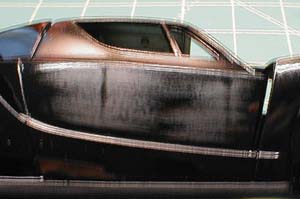
| Also, the right door panel had two
vertical sink marks. Again, I used Tamiya's 1500 grit sand
paper to eliminate them.
|
|
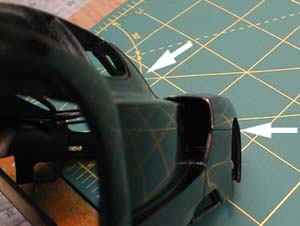
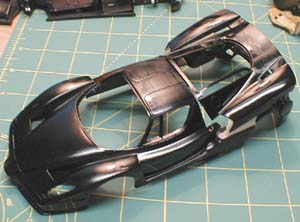
| As mentioned in page 1, body preparation
and test fit is
very important, and here is the result. The engine cover is
tightly shut, and the line is even. |
|
| After the first sanding is done, the
engine cover is fixed to the body with a tape, and it's ready for
the second painting, which is additional two or three layers of the
body color. |
|
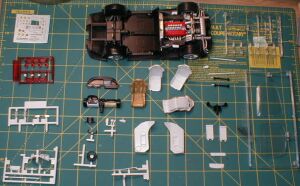
| While waiting for the body paint to dry,
I checked the remaining parts, and thought how to proceed. At this point, almost all parts
were removed from the tree, except the clear part. Just be
careful, when you throw away an empty part tree.
|
|
|
  |
|