Rear Derailleur |
|
A complicated part like the rear derailleur starts by thinking about how to break down into simple pieces. | |
7-1a![]() 7-1b
|
I transferred the drawings to
small pieces of plastic and cut them out, using a sharp hobby
knife. It's better drilling holes as shown, and cut the inner openings
first, because it's easy to hold the plastic sheet. Once all openings are cut
out, I carefully cut the outline, and slowly removed the
excess plastic by using a new blade.
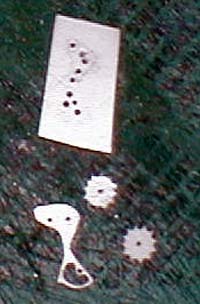
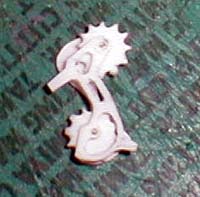
The teeth and curves were filed and cleaned with a very small needle file of 0.7 mm diameter. 
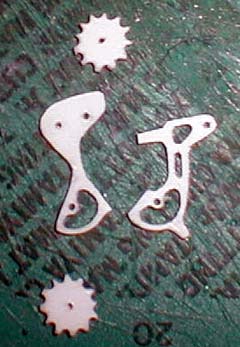
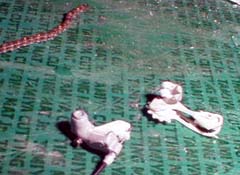
Finished the tensioner sprockets and their frames are shown. |
7-3a![]() |
I used 0.5 mm brass rod to fix the
sprockets to the frame. I installed the chain for testing, and it
looked good. The sprockets rotated as they should.
7-3b |
I cut the brass rod short, and filed the end to fix it to the frame of the derailleur. | |
7-2a![]() |
7-2b![]() |
7-4 |
The derailleur has two arms,
which allow the tensioner frame to shift sideways, and they were made from plastic sheet. 
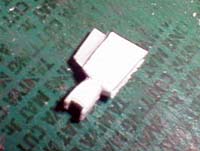
A small piece, shown in this picture, was made from a laminated plastic. When making a complicated shape like this, find a side, which can be easily cut, and leave that side attached to a big piece as shown, so that you can hold it easily, while carving the other sides. |
7-5a![]() |
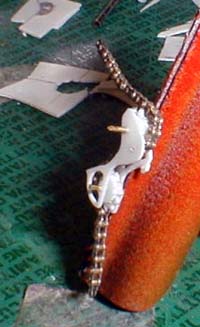
The last piece was the base of the derailleur, and it was made with a combination of 2.0 mm plastic rod and two 1.0 mm plastic sheet. I applied super glue as putty, and after basic shape was made, I used a needle file to form the final shape. 
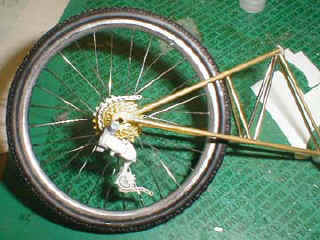
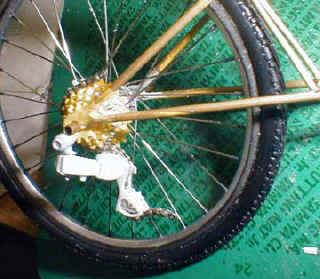
The arm was glued to the mount, but I installed two short brass rods to the mount and the tensioner, so that it could move freely. (Compare 5a and 5c) |
7-5b |
7-5c |
7-6a![]() 7-6b |
I peeled off a part of vinyl from
a small cord,
which I usually use for car modeling, and I twisted the metal wire to simulate the
braded look. Then, I glued it to the derailleur and fabricated the
rest of the detail with plastic sheet.
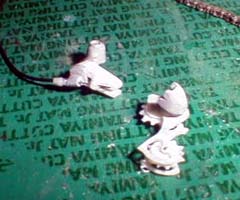
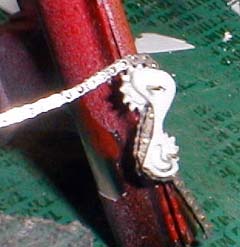
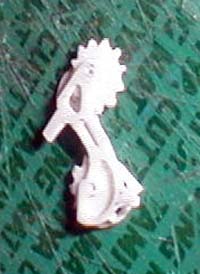
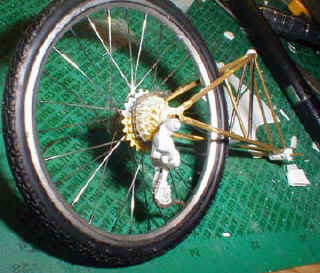
Photo 7-6b shows the completed rear derailleur.
|
Another assembly was finished, but there were many more to go. Next is the front derailleur, which is another complicated part.
|