Frame
|
| Some parts are symmetrical, and
they can be duplicated in resin, but some parts are
not. I started with those asymmetric parts, that doesn't need to be resin cast. |
|
2-1
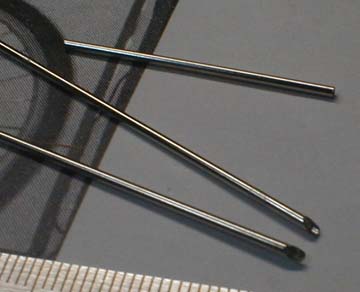 |
The frame was made with metal rods
of various diameters. I used 0.7 mm pipe for the main pipes, and
0.5 mm and smaller brass rods for the support members.
|
2-2
 |
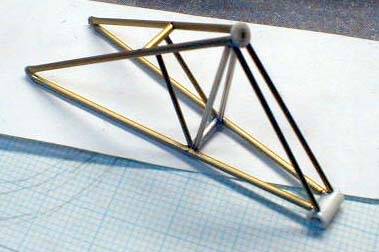
First, I drilled holes on the
front and rear pipes, and I installed small rods for reinforcement. Then, I cut a vinyl pipe and
put them around the end of the three main pipes, which
simulates the bush(?) at the end (3 black pieces near the rear horizontal pipe),
and I added the bridge in the middle of two upper pipes. |
2-3
 |
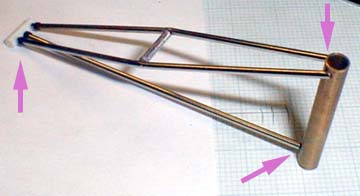
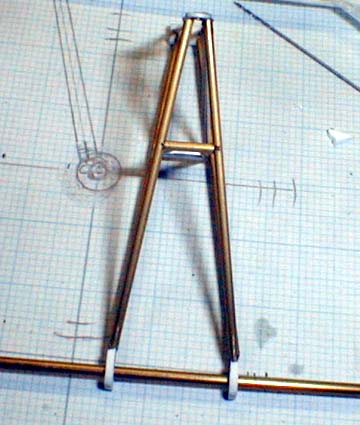
I added support members one by
one, based on the measurement and my drawing.
Here is a picture of the finished
front frame. Small support members were fixed with superglue.
The frame looked good, but this frame wasn't used, because it was too wide after I
put two outer pipes. |
2-4
 |
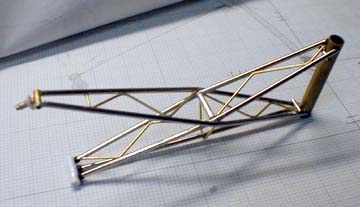
Human eyes don't recognize two
identical objects in different sizes the same way, and that's the tricky part of
modeling. A model has to look better in small scale, instead of
trying to accurately copy it based on the measurements. So, I used 0.6 mm for the main pipes, and 0.4 or smaller for the
support members to make a new frame. This 0.1 mm difference in pipe
diameter made a noticeable difference in 1/8 scale model.
|
2-5
 |
The rear frame was made in the
same manner. The main frame was superglued to the front horizontal pipe, using
some reinforcement pins inside, and the rest was simply superglued. |
2-6
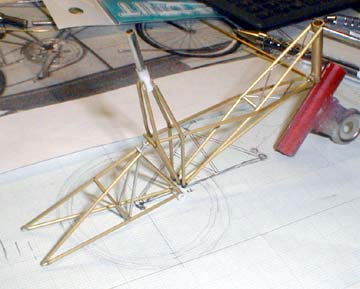 |
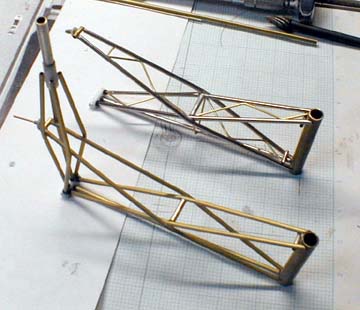
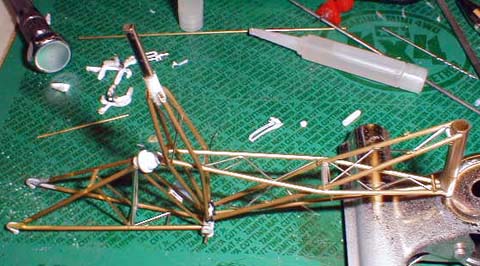
This photo shows the frame, which
is almost finished. Some small members had still be installed, and they were
mainly made with 0.5 mm brass rod. |
2-7
 |
The end of the rear frame, which
holds the rear axis (what do you call it anyway?) was made from a laminar
plastic sheet.
I drew the shape on a plastic sheet, and I roughly trimmed it to the final
shape. Then, I drilled a hole, inserted a rod, and filed it to
the final shape, while holding two pieces together to make two identical
pieces. |
2-8
 |
The center line of the frame and
the rear axis had to be perpendicular to each other. I used a grid
paper to align them correctly. |
2-9
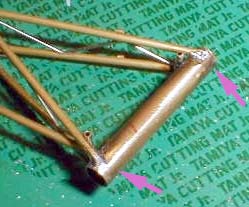 |
I wasn't sure if super glue was
strong enough to hold the bond, so I soldered the spots, where stress
was expected. The top arrow points at an unfinished spot, while the
bottom arrow shows the sanded and finished spot. The finished frame is shown in the
picture below. |
2-10
 |
|
| Next is the rims and
spokes,
and I'll demonstrate how to scratchbuild the rim with plastic sheet. |