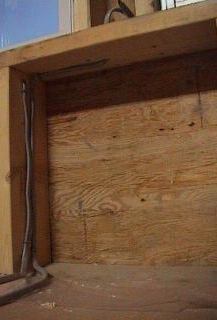
The illumination in this alcove will be supplied by lights running on 'tracks' running vertically on each side of the two front windows (three tracks in all). As my need for lighting will change during the day as the sky lightens and darkens, and as the angle I need the light to strike my printing bench will vary depending on the particular block being printed, I need a lot of flexibility in both volume of light, and in positioning. Using track lighting will - I hope - provide me with this flexibility.
Now that it's time to insulate this wall, the wiring for these tracks has to be laid in place - here are the wires for the centre one and the one coming from the left ...
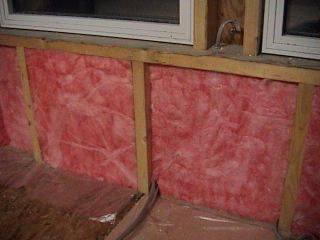
With the wires tacked in place, time for the insulation. I'm using a very heavy-duty insulation for this front wall. It's reddish, rather than the usual yellow colour, and is very dense. But I could only get the batts in 10cm thickness, and they won't fill these 2 x 6 wall spaces. The one on the right is a single batt snugged into place; the one on the left has an extra 'slice' laid on top to fill up the cavity.
Here we are part-way through the job - some of them have the extra slice in place, some don't yet ...
This stuff is so dense and stiff that it won't 'fluff up' to compensate for careless cutting; I have to slice these pieces to an exact fit.
But it does fill the spaces wonderfully ... I can't imagine how there can possibly be any draughts through a wall like this!
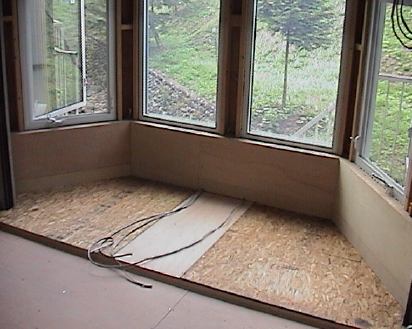
Once it was all in place, and polyfilm stapled on top, I panelled it with sheets of quarter-inch ply.
But taking the photo from the other direction before heading upstairs to get back to the printing work, I see that I forgot to slice out the opening for the cat door! Good thing Boots isn't used to using this yet ...
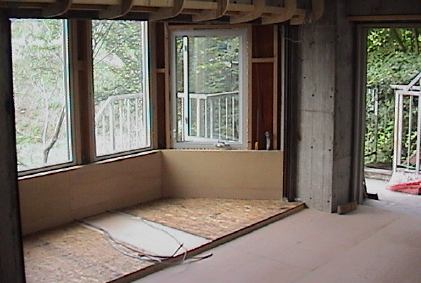
And seeing that framing partly visible up at the top of this picture reminds me that I did do some other work in the room a few months ago, but neglected to add a page to this series of photos. Here's a better shot of it:
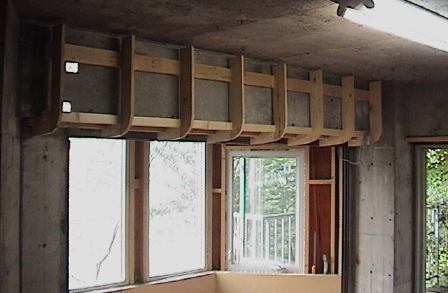
Those massive concrete beams are all going to have to be 'boxed in' and insulated. This beam hangs directly above the 'entrance' to the alcove, which is one reason why I decided to put the printing platform there - there is just not enough headroom for me to walk around freely in that space ...
It'll be a long time before a photo of it will be ready for this page, but you will eventually see how the series of horizontal strips of wood that will form the ceiling, will 'carry over' onto this beam, and around into the alcove ... One day ...