|
|||||||||||||||||||||||||||||||
McLaren
Honda MP4/6 |
|||||||||||||||||||||||||||||||
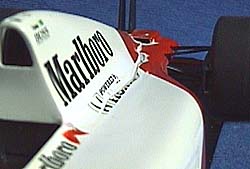 The first thing after easing the tension was to fit the cowl to
the chassis, and reshape the body. Then, superglue was used to fix the loose part
temporarily. Coarse sand paper was used to smooth the gap before applying thinned
putty. The first thing after easing the tension was to fit the cowl to
the chassis, and reshape the body. Then, superglue was used to fix the loose part
temporarily. Coarse sand paper was used to smooth the gap before applying thinned
putty. |
|||||||||||||||||||||||||||||||
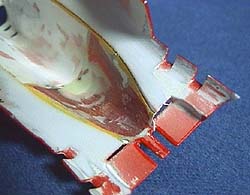 The back
of the cowl was sanded a little to eliminate the interference. The gap was filled
with superglue. Notice that I used many different materials and kit parts to form
the part. The back
of the cowl was sanded a little to eliminate the interference. The gap was filled
with superglue. Notice that I used many different materials and kit parts to form
the part.
|
|||||||||||||||||||||||||||||||
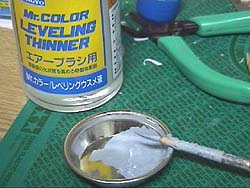 Thinned
putty is quite handy because it flows into the gap itself, and conforms to the surface and
flattens itself. I've been using this technique to eliminate the medium sized gaps.
Gunze Sangyo's Mr. Surfacer was inspired by this technique used by the experienced
modelers. Thinned
putty is quite handy because it flows into the gap itself, and conforms to the surface and
flattens itself. I've been using this technique to eliminate the medium sized gaps.
Gunze Sangyo's Mr. Surfacer was inspired by this technique used by the experienced
modelers. |
|||||||||||||||||||||||||||||||
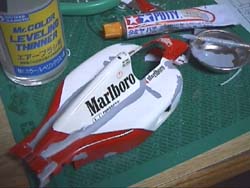 Thinned putty was applied to the necessary areas. It
shrinks a little, but it dries fast. After this, a little finer sand paper was used
to smooth the surface. The gaps can't be eliminated by only once of putty
application, so the same procedure has to be repeated several times. Thinned putty was applied to the necessary areas. It
shrinks a little, but it dries fast. After this, a little finer sand paper was used
to smooth the surface. The gaps can't be eliminated by only once of putty
application, so the same procedure has to be repeated several times. |
|||||||||||||||||||||||||||||||
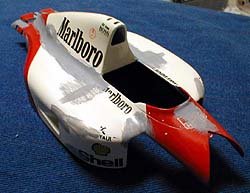 Finally the gaps are getting less noticeable, and they are almost
invisible in the picture. Finally the gaps are getting less noticeable, and they are almost
invisible in the picture.
|
|||||||||||||||||||||||||||||||
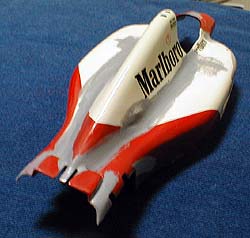 The same stage is shown from the back. The left side needs
a little more filling and sanding, but things are going well. The same stage is shown from the back. The left side needs
a little more filling and sanding, but things are going well.
|
|||||||||||||||||||||||||||||||
| Questions and comments? Send mail to Hiroaki Fukuda |
|||||||||||||||||||||||||||||||
McLaren
Honda MP4/6 |
|||||||||||||||||||||||||||||||