Page 2 of 2
|
Modeler's 1/24
|
Updated on 02/20/00 |
| As I stated, the Modeler's kit didn't seem to consider the shrinkage of casting, and it is slightly smaller to be 1/24 scale. To make the model fully detailed, I had two choices. One is to use the front section of the AMT or Revell kit. The other is to use the kit part. |
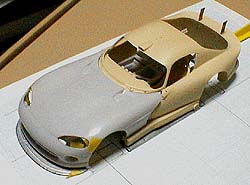 After
carefully removing the front section of the kit, the cowl of the AMT kit
was test-fitted as shown. After
carefully removing the front section of the kit, the cowl of the AMT kit
was test-fitted as shown. |
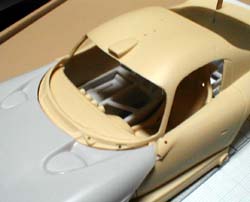 Problem
of using the stock Viper cowl was that I had to modify it and make louvers
myself, and I thought that it would take some time. Also, the front
bumper, especially the radiator openings have to be modified to represent
a correct GTS-R appearance. Problem
of using the stock Viper cowl was that I had to modify it and make louvers
myself, and I thought that it would take some time. Also, the front
bumper, especially the radiator openings have to be modified to represent
a correct GTS-R appearance.
So, I decided to take the second option. |
|
|
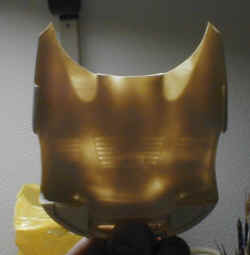 The front
cowl was carefully removed, and had no significant damage. I used Dremel tools to
thin the cowl. Although it wasn't easy to
make the thickness even and constant, I was able to make an acceptable
part as shown. The front
cowl was carefully removed, and had no significant damage. I used Dremel tools to
thin the cowl. Although it wasn't easy to
make the thickness even and constant, I was able to make an acceptable
part as shown. |
 Then, the
front bumper was removed from the cowl. I used a conventional
practice of cutting doors and hood as shown. I simply used the back
side of sharp knife, and deepened the panel lines until it reached the
back side. Then, the
front bumper was removed from the cowl. I used a conventional
practice of cutting doors and hood as shown. I simply used the back
side of sharp knife, and deepened the panel lines until it reached the
back side. |
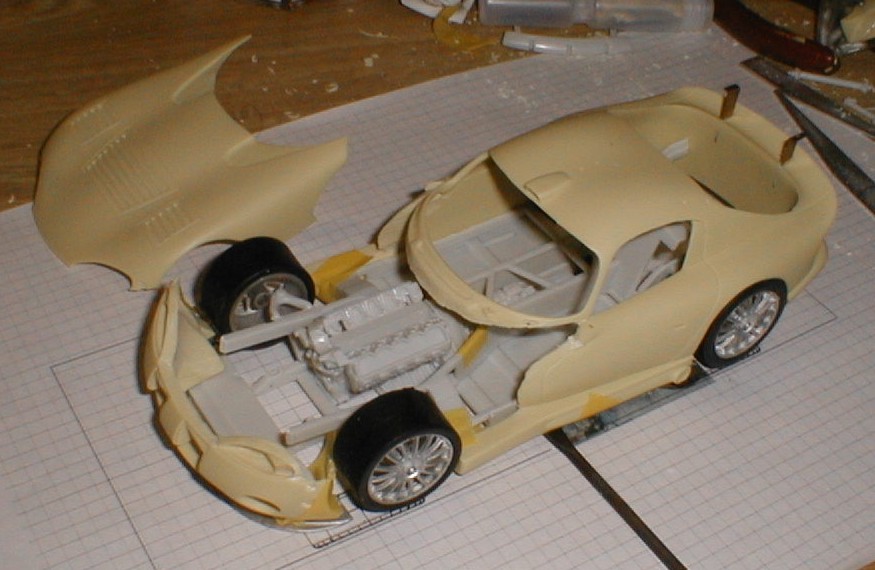 The
main body parts were ready for reinforcement before painting. I just
wanted to display how the parts would go together. The
main body parts were ready for reinforcement before painting. I just
wanted to display how the parts would go together. |
Modeler's 1/24
|
|
|