Forgotten Beauty of Woodblock Prints (II)
In the previous issue, I began what will become a series of stories outlining possible content for a video documentary that would give people a good overview of my work. In that first part, we saw that woodblock prints can be seen as 'objects' rather than simple 'pictures'. Now let's get a glimpse at how they are created ...
The Forgotten Beauty of Japanese Woodblock Prints
[Part Two]
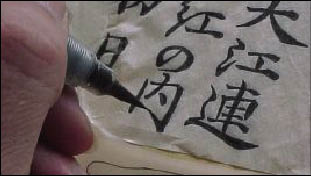
[Camera] The tip of a black brush, drawing a delicate line on thin translucent gampi paper. David is tracing the hanshita, working over a light table in a darkened room. This thin paper is taped over an enlargement of an image of the Edo-era print he is reproducing, and light shines up through the paper onto his face.
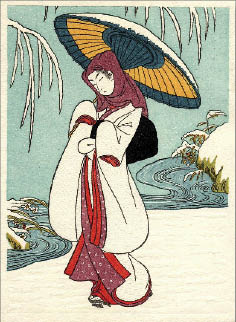
[Narration] This is where the process of producing a traditional Japanese woodblock print begins - with the lines of the design being committed to paper. The print we are going to watch come to life is a reproduction of an Edo-period design, a 'surimono' print originally published in the 1840's.
 [David (voice over)] [Camera continues to show the tracing work, along with interspersed shots that match his comments] "In the old days, the master copy of the design that would be used to guide the carving - the hanshita - would have been prepared by a specialist craftsman, one highly skilled in using the traditional brush. He took the design supplied by the artist, which was sometimes in very rough sketch form, and 'translated' it into something with clearly defined lines more suitable for carving.
"My skill with a brush falls far short of what they could produce of course. So I do this job using a greatly enlarged image of the source image, one that allows me to see every tiny detail. Once I have finished tracing all of the original design, I have this mechanically reduced back down to the original scale, again onto this most delicate and strong paper - hand-made gampi. This is the only part of the process in which I use the assistance of modern technology - from this point right to the end, I will be working with the same tools used by the craftsmen who produced the Edo-era print."
[Camera] Closeup of the completed hanshita, perhaps with a scale laid on top. The lines are delicate beyond belief, and the viewers have to be asking themselves, "How can this possibly be carved?" We then move to the next step - pasting this hanshita onto the wood. David is at his carving bench, blank block before him. He talks about the procedure as we watch him do it.
[David] "The wood is yamazakura - the mountain cherry. There is absolutely no other wood that is more suitable. Some are too hard, and don't allow the moisture in the pigment to be properly absorbed. Other woods are too soft, and the carved lines soon break down. This one offers the perfect balance; when you have a fine piece of this cherry, beautifully fine lines can be carved, and clean colours can be printed. And if you take good care of the carved block, many copies of the print can be made, far more indeed than with many metal plates."
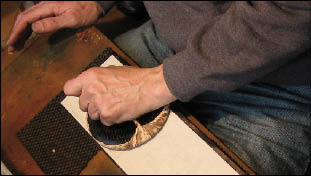
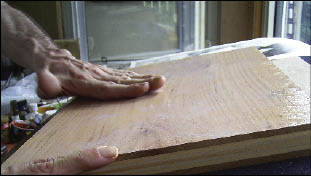 [Narration - as David continues to work] In the old days, pasting this delicate sheet onto the surface of the wood was a job for only the most experienced men, as any small distortion at this point would be carried into the final print. ... The hanshita is pasted onto the wood face down. As the sheet begins to dry, David uses his fingers to peel away the paper fibre by fibre, leaving the design clearly visible on the surface of the wood.
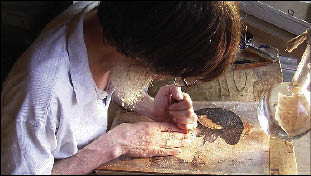
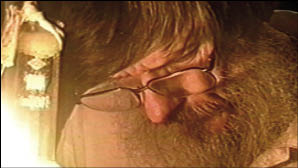
[Camera] During the next segments, it is necessary to 'collapse time', and these shots of the carving process should show different hours of the day, and David wearing different clothes, as the carved region on the block increases bit by bit. (Although it won't take long enough to show his beard growing longer!)
[Narration] Carving this block will take David about 5 days. He will sit here at this bench, face bent close to the wood, for many hours each day. By his side is a wooden bucket, on top of which sit some of his sharpening stones, which he will use many times each day, to keep a keen edge on the blades of his carving tools.
[David (voice over during carving)] "These knives are such a pleasure to use. Each blade is made from pieces of steel hammered together in just the same way that Japanese swords are made - with an extremely hard (but brittle) layer for the sharp edge, laminated to a softer steel for strength. When you look closely at the edge of the knife, you can see these double layers, just as you can with fine swords. I am certainly not a 'samurai', but I use a very similar tool!"
[Narration - as camera slowly pans closeup over finished keyblock] This is the 'key block', which will be used to print the outlines of the design. This would be a work of art in its own right, but is just one step along the way to creating the finished print.
 [David] "This block is now done, but as this will be a multi-coloured print, we need more blocks. And the Edo-period craftsmen came up with a wonderfully simple method of getting everything to fit together. Look down here at one corner of the block - there is a notch carved into the wood. And over here - there is another. Later, once I start printing, the paper will fit snugly into these notches, allowing perfect registration."
[Narration] David now uses his printing tools and a special smooth paper, and takes a number of proof impressions of the carved block. He then uses these sheets to analyze how the design will be broken down into its component colours. For example, this sheet indicates the areas that will be required to print the kimono colour ... this sheet for the background. One sheet for each colour.
[David] "Because this time I am making a reproduction, I have a clear model to follow at this stage. But when you are making an original, all this colour separation takes place in your mind. You have to imagine what the final result will be."
[Narration] Here is the complete set of colour separations for this print. These are now pasted down onto fresh blocks, and carving begins again.
[David] "See how the registration marks have been accurately transferred to this block; these notches match those on the keyblock exactly! What a wonderful system!
 [David continues speaking during scenes of the carving ...] "Back in the old days, prints like these were made with teams of craftsmen; the most experienced men would do the most important parts - things like the faces, or delicate calligraphy. Less capable men would handle the 'rougher' parts of the work. The blocks would be passed around the shop as the work progressed. Can you imagine how noisy it must have been in some of the larger workshops, with many men hammering away on the blocks?!
"In my case of course, I do everything myself, so I can sometimes imagine that I am a young apprentice, and sometimes I become the 'old master carver'!"
[Narration] In the Edo period, carving and printing were always done by different men, but David does both jobs. Once the set of blocks is ready, David must clean up all his carving tools, and prepare his printing bench.
[David speaks as we watch him prepare the tools] "Doing both jobs is of course something that I take a great deal of pride in, but I don't know if it really is such a good idea. An old carver said to me one day, "If you would quit fooling around with printing, you could become a really good carver," and I suppose he was right. But it can't be helped - I want to do it all by myself!"
[Narration] Traditional Japanese printers use only a very limited number of base pigments. To create the green colour needed in this print, David will mix indigo and yellow, adding some sumi as needed.
[David - face to camera] "This is a very important point about our work. The colours you see in a traditional Japanese print aren't bought off the shelf in a shop, they are created by the printers themselves. Look at this photo of a colour separation sheet that was used in the preparation of an Utamaro print back in the Edo era. We can clearly read Utamaro's instructions to the printers: 'purple' 'green' 'yellow'. But this means nothing. What kind of purple? There are a thousand different purples possible!
 "It was up to the printers to create a good balance among all these tones, and the best printers could produce masterpieces! I myself still struggle with this sometimes, but I am gradually getting better at it."
[Narration - as David uses a wide brush to moisten his printing paper] The paper David uses for making all his prints is the famous Echizen hosho. There are now only a few households left producing this paper, and this is one of David's greatest worries.
[David] "There are many different kinds of washi produced all over Japan, but only one is suitable for this kind of printmaking. It is made in Imadate-machi, a small village in the snow country region of Japan, a place that has been supplying this paper for hundreds of years. Most of the well-known ukiyo-e prints from Edo times were created on this same paper, made in that same village. Many dozens of workshops once produced it, but only a few still continue. This paper is the very heart and soul of Japanese printmaking, and if I were to lose it - if there were no more suppliers - my own work would come to an immediate end. There are no alternatives."
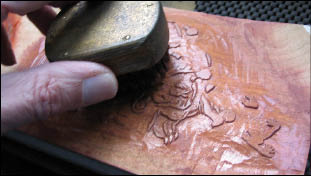
[Camera] David now begins printing, and we see how the basic process works: he dabs colour onto a block, then brushes it out smoothly. He takes a sheet of paper and carefully guides it into the registration marks that we saw earlier. Then, taking hold of his circular printing pad - the baren - he rubs the back side of the sheet of paper to take the impression. He lifts the sheet, and shows us the result ...
 [David] "So you see the basic idea. These shapes carved onto the woodblocks provide the means for applying colour to a certain area of the paper. There are 12 impressions needed for this design; here are the blocks [David holds them up for us, turning them over to show how both sides of the wood surface are used], and here is the collection of pigments that I will use" [We see the array of bowls filled with coloured pigment.]
[Camera] David now proceeds to use the blocks and pigments to produce a single copy of the print, as we watch. Because this will take some time, the camera goes 'fast forward' between some of the steps, and slows to a normal pace to show the main elements of the process. In one corner of the screen, we see the image building up stage by stage until is it finally complete.
[David (speaks to camera)] "There is our finished print, and as you saw, every colour on the sheet had to be printed separately. Imagine then, the kind of work it takes to produce a pile of 200 copies of such a print. It sounds like the most inefficient system that could possibly be devised!
"But do you know, it is no such thing! It took me 9 days to carve the blocks for this print - five days for the keyblock and another four days for the colour blocks. I am now ready to set to work to produce 200 copies of it, and this should take me about 12 days. So, after a total of 21 days of peaceful work, I will have a stack of 200 beautiful woodblock prints. They are made on one of the finest papers on this planet, and they will last hundreds of years.
"For every one of these 200 sheets - hundreds of years of pleasure, for generations of people yet unborn, all for my 'investment' of 21 days of work.
"Inefficient? I wish every 21 days of my life could be spent so usefully!"
[End Part Two]
(to be continued)


 When it came time to prepare my new year greeting print this year, I did the same thing as I did last year, and selected a design that would give me good practice at some traditional carving! My own recent prints have not used many outlines, and as I really don't want to lose my hard-won ability to make ukiyo-e prints, I chose a design that would give me a good workout!

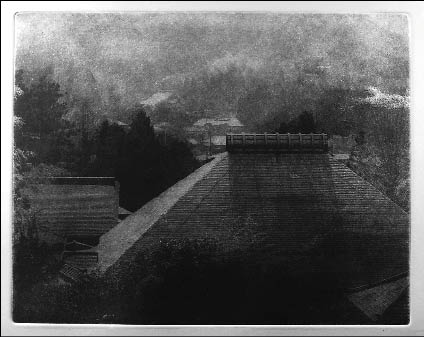
 The images accompanying this story will of course at first glance look to you like photographs, and photography is indeed the first step in the creation of Peter's work. But only the first step. The image that he sees in the viewfinder of his camera provides the 'seed' from which he will produce the final print. The process he uses is photogravure, an etching technique which dates from the era of the earliest photography. In a basic single-sentence description: the image from a camera is used with light-sensitive 'resist' materials to produce an etched copper plate from which prints can be made on a press.
  In a pattern very similar to my own, Peter had no idea - nor intention - that he would ever end up as an artist; his education and earlier employment were in other fields. But - in his words - "a chance acquaintance with the many uses of ultraviolet light ... in semiconductor wafers, printed circuit boards, fast-drying commercial inks, glues, optical fiber - and photogravure ..." planted the seed for what was to come. And then, upon seeing an exhibition of photogravures from the 19th century, the seed was nurtured, and grew into the desire to learn how to make them himself.