The moment you've all been waiting for ... haven't
you? It seems that perhaps I made the quiz in the last issue somewhat
too difficult, as most of you gave up without sending in any answers.
There were a few though, who got quite a number of questions correct
... they should - they are printmakers! In any case, here are the
answers - 10 'one-point' lessons in traditional printmaking.
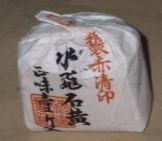
1) Those pigments that do not dissolve readily in
water are first soaked in alcohol. Most of the traditional printers
thus keep a bottle of sake by the side of their workbench (purely for
professional use, of course). Actually, as I don't like the idea of
all that sugar staying in the print, and perhaps providing food for
bugs of whatever kind, I use pure alcohol from the pharmacist. I
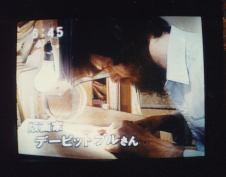
didn't even have any sake in the house when the quiz program TV crew
came over that day, and Michiyo had to run out and buy a bottle. She
made a good choice though, because when the president of the company
who made it saw me display it on TV, he sent us a complimentary
supply of the stuff!
2) The night before starting work on the printing
process, Japanese printers thoroughly moisten their printing paper. A
lot of Western printmaking is done on dry paper, with oily pigments,
and the resulting image is formed only on the surface of the sheet.
The paper simply acts as a carrier and support for the pigments. The
colour in Japanese work, however, is actually driven deep into the
body of the paper by the baren, sometimes even coming out onto the
back side. This is only possible if the paper has been moistened
first. Attempting to print on dry paper just gives a speckled, uneven
surface.
The second reason has to do with paper expansion.
If one were to try and make a multi-coloured print on dry paper, the
paper would absorb moisture from the first colour, and in doing so
would expand slightly. The second colour would then no longer 'fit'
in the proper place. If however, the paper is wet (and expanded) to
start with, then there is very little further expansion during the
subsequent printings. After all colours are done, the paper is
carefully dried, and shrinks back to natural size. The finished print
thus always ends up slightly smaller than the blocks from which it
was printed!
3) I got my camellia oil from Michiyo's mother,
but I don't put it on my hair like she does! I apply it to my 'baren
wata', the cotton pad on which my printing baren rests during work.
The surface of the bamboo skin is thus kept lightly lubricated. This
has a few effects: the baren of course slides more easily across the
paper, and is less likely to tear the paper surface. The bamboo skin
also absorbs less moisture from the wet paper, and thus stays wrapped
tightly for a longer time. (It's common when watching older printers
to see them absent-mindedly rub their baren on their head from time
to time. They are actually picking up a bit more oil ....)
 4) Three uses for bamboo
skins: 1) Of course, the outer wrapping of the baren itself is a
whole skin, stretched and tied in place. 2) The inner 'coil' hidden
inside the baren is also made of bamboo skin (we'll be investigating
this more closely in an upcoming issue of his newsletter ...). 3)
Left-over bits of bamboo skin are used to make the 'tokibo', the
small brush used to transfer the pigment from the bowl to the
block.
4) Three uses for bamboo
skins: 1) Of course, the outer wrapping of the baren itself is a
whole skin, stretched and tied in place. 2) The inner 'coil' hidden
inside the baren is also made of bamboo skin (we'll be investigating
this more closely in an upcoming issue of his newsletter ...). 3)
Left-over bits of bamboo skin are used to make the 'tokibo', the
small brush used to transfer the pigment from the bowl to the
block.
 5) Why don't I use
'seki-o'? Well, would you use a pigment made of 50% sulphur, and 50% arsenic? Would
you bend over your bench and grind it in a mortar until it became
nice, fine powder, floating around the room? And even if you would,
what would your spouse say about it?
5) Why don't I use
'seki-o'? Well, would you use a pigment made of 50% sulphur, and 50% arsenic? Would
you bend over your bench and grind it in a mortar until it became
nice, fine powder, floating around the room? And even if you would,
what would your spouse say about it?
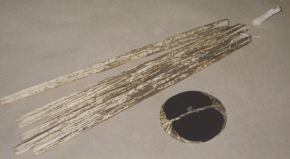
6) I learned about shamisen string when I did a
television appearance visiting the carver Ito Susumu. He inspected my
tools, and was surprised to find that I was using masking tape to
hold my knife blade in position in the handle. I hadn't really
thought that this was a problem, but when I followed his
recommendation and used shamisen string to tie the blade tightly in
place, I found it much easier to guide the knife.
7) Which comes first, the outline or the colours?
This one puzzled me too when I was working on my own back in Canada.
It's nice to do the black first, so you can then guide the colours
into the correct location, but don't the colours cover up the black
lines? Actually, they don't at all. Although the colours may look
solid and deep when printed onto white paper, they are actually quite
transparent, and the strong black lines show clearly through.
8) When I first tried printmaking, I bought a few
nice soft brushes for spreading the pigments. They were useless. The
printmaker's brush must have strong quite coarse hairs, to properly
spread the pigment/water/paste mixture well over the block. The
pigment is not 'painted' onto the block, but 'scrubbed' over the
surface, so the brush hairs must be firm, not soft. But this causes a
problem with the finishing strokes. As these final strokes are made,
the strong hairs of the brush leave lines in the pigment, and these
unwanted lines show up in the finished print. The solution is to
prepare the brush by rubbing it over an abrasive surface, causing the
tip of each hair to soften and split (kind of like the unwanted
'split ends' in human hair). Sharkskin makes a perfect abrasive
surface for this. Rubbed one way it is quite smooth. Rubbed the
other, it will tear your skin at a touch. It is thus the apprentice
printer's job to regularly rub each of the brushes against this
natural 'sandpaper', to keep the tips of the hairs soft and gentle.
As the brush wears down, it must be re-treated, again and again,
until it finally becomes too short to use. (Maybe one day I'll have
an apprentice to do this! Maybe.)
9) I am told that the carving knife modern
printmakers use is actually descended from a type of short blade worn
by samurai many years ago. 'Katana' is the name for their sword, and
the shorter blade was known as 'ko-gatana', or 'small sword'. This is
the term that the older carvers still use for our knife, which
doesn't look much like a sword, but which is actually made with a
similar laminated technology, with a soft, flexible steel acting as
support for a hard brittle steel sharpened to a keen edge.
 10) I'm sure Matsuzaki-san
laughed when he saw this question. "Why is he doing it that old way?"
he must have asked .... The bamboo skin cover for the baren is very
strong, but it wears out very quickly under the stress of heavy
rubbing, and must be changed frequently. Printers keep a bundle of
skins handy, and it is a simple couple of minutes work to prepare a
new one. Simple ... if you know how. Simple ... if you watched your
master do it a thousand times. Simple ... if you've done it yourself
ten thousand times. Not so simple for me ... yet. If you want a laugh
sometime, ask my wife to describe the scene when I recover my baren
...
10) I'm sure Matsuzaki-san
laughed when he saw this question. "Why is he doing it that old way?"
he must have asked .... The bamboo skin cover for the baren is very
strong, but it wears out very quickly under the stress of heavy
rubbing, and must be changed frequently. Printers keep a bundle of
skins handy, and it is a simple couple of minutes work to prepare a
new one. Simple ... if you know how. Simple ... if you watched your
master do it a thousand times. Simple ... if you've done it yourself
ten thousand times. Not so simple for me ... yet. If you want a laugh
sometime, ask my wife to describe the scene when I recover my baren
...
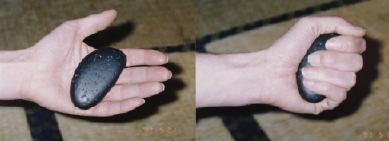
If the skin isn't stretched tightly enough, the
resulting baren is unuseable. The water-softened skin is first rubbed
with the hands on a hard board to stretch it. After it has expanded
adequately, it is rubbed on the same board with a hard object, to
further soften some of the fibers, and break down some of the
protruding ridges. It is then trimmed and tied around the baren disc.
(Ten short words to describe that process, and ten long years to
learn it!).
Of course, the stone in the quiz is the hard
object I use to rub the skin, just like printers many years ago. I
chose it very carefully, as one too small would not supply enough
force, and one too big would damage the skin. And Matsuzaki-san - why
is he laughing? Well, he doesn't care as much about traditions as he
does about efficiency .... he uses the back end of a pair of Japanese
wrought iron scissors. Oh, these modern ways ....!


 Our main story
this time is of course the follow-up to the quiz in the previous
issue. I got some great responses in the mail ... not a whole lot of
right answers ... but certainly a lot of interesting answers ...
Thanks to those of you who participated, and you can find out how
well you did by checking the real answers in this issue.
Our main story
this time is of course the follow-up to the quiz in the previous
issue. I got some great responses in the mail ... not a whole lot of
right answers ... but certainly a lot of interesting answers ...
Thanks to those of you who participated, and you can find out how
well you did by checking the real answers in this issue.

 One exciting
event for me during this time was receiving my first real 'baren'
(printing tool). I wrote about that visit to Gosho-san in an earlier
issue of this newsletter, and I hope was able to communicate my
excitement at my new 'toy'. My printing took an immediate jump in
quality, partly from the wonderful tool itself, and partly from the
increased self-confidence that came from simply having it. I wish it
was always that simple to 'buy' progress ...
One exciting
event for me during this time was receiving my first real 'baren'
(printing tool). I wrote about that visit to Gosho-san in an earlier
issue of this newsletter, and I hope was able to communicate my
excitement at my new 'toy'. My printing took an immediate jump in
quality, partly from the wonderful tool itself, and partly from the
increased self-confidence that came from simply having it. I wish it
was always that simple to 'buy' progress ...
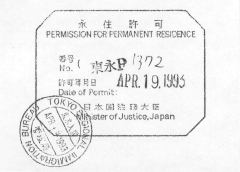
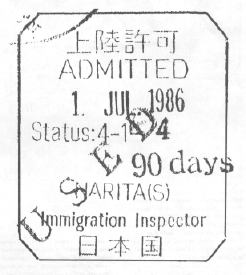 At Narita I didn't know
what to say to the Immigration people. I knew that I could get a
three month tourist visa, which could probably be renewed for another
three months, but with a tourist visa I wouldn't be able to work and
support my family. I hoped that maybe I could get some kind of a
student visa, which would allow a certain number of hours of work
each week. The Immigration man looked at Michiyo and the kids. "Is
this your family? Your wife? Is she Japanese?" he asked. "Yes ... yes
... yes," I answered. "Well, why don't you get a 'spouse' visa? With
that, you can live where you want, study whatever you want, and work
at whatever you want - no restrictions."
At Narita I didn't know
what to say to the Immigration people. I knew that I could get a
three month tourist visa, which could probably be renewed for another
three months, but with a tourist visa I wouldn't be able to work and
support my family. I hoped that maybe I could get some kind of a
student visa, which would allow a certain number of hours of work
each week. The Immigration man looked at Michiyo and the kids. "Is
this your family? Your wife? Is she Japanese?" he asked. "Yes ... yes
... yes," I answered. "Well, why don't you get a 'spouse' visa? With
that, you can live where you want, study whatever you want, and work
at whatever you want - no restrictions."