Author: Tamito KAJIYAMA <RD6T-KJYM at asahi-net dot or dot jp>
This document provides a short introduction to the equal-area projection script, an add-on script for the vector drawing tool Skencil (formerly Sketch). Using the script you can easily draw a certain kind of three-dimensional drawings in three-quarter view. This document assumes that you have already installed the equal-area projection script and that you know the very basic usage of Skencil.
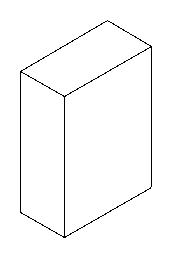
As an example, let's draw a simple rectangular parallelepiped. In general, you take the following three steps in order to draw a rectangular parallelepiped using the equal-area projection script.
Now, let's follow these three steps one after another in detail.
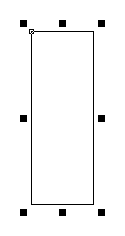
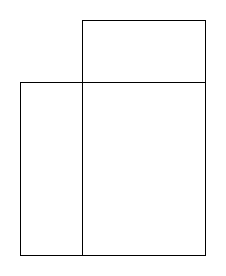
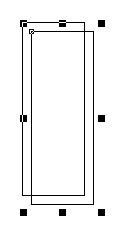
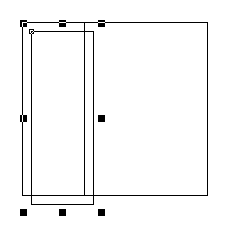
First of all, you draw a tall rectangle as illustrated below. Size does not matter.
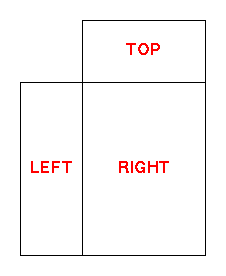
Next, you draw the second rectangle that has the same height as the first rectangle but a different width. To make it easy to carry out this task, select Arrange / Snap to Object from the menu and turn on the "Snap to Object" option. The second rectangle can be drawn as follows.

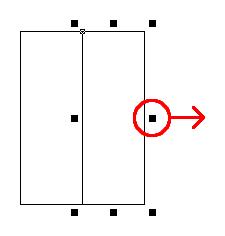
Let's turn to the third rectangle. This time, make sure that the third rectangle has the height equal to the width of the first rectangle and the width equal to the width of the second rectangle.
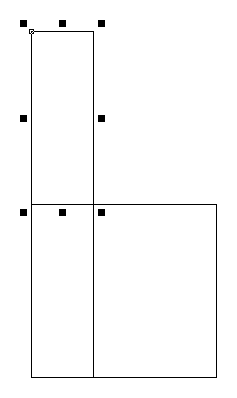
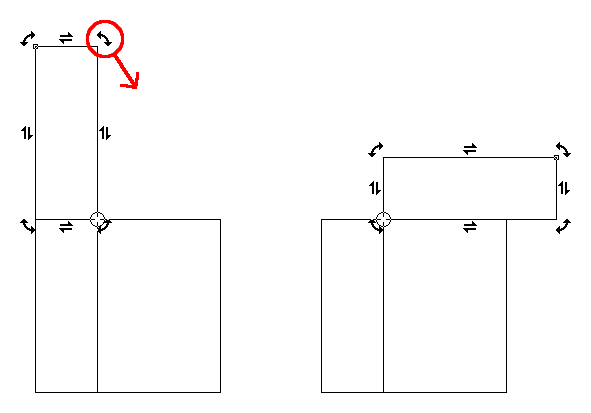
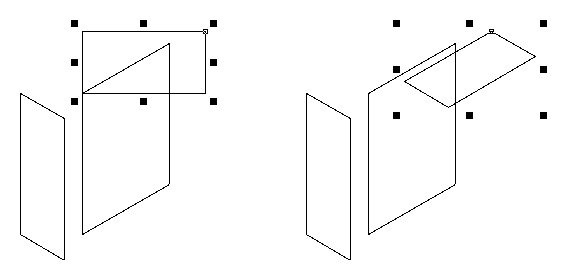
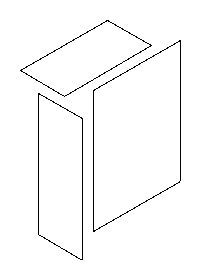
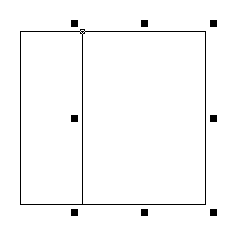
The equal-area projection script consist of three commands named Left, Right and Top. You apply the Left command to the lower left rectangle, the Right command to the lower right rectangle, and the Top command to the upper right rectangle. The figure shown below depicts the correspondence between the commands and rectangles. You may execute the three commands in any order, but you will get strange results if you apply the commands to wrong targets.
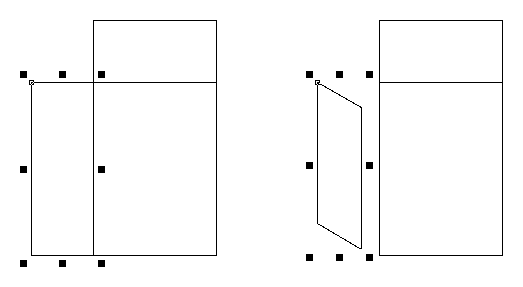
First, let's apply the Left command. Select the lower left rectangle and select Script / Equal-Area Projection / Left from the menu.
Next, apply the Right command. Select the lower right rectangle and select Script / Equal-Area Projection / Right from the menu. You will see the transformed object overlapping with the upper top rectangle, but for now let's leave them as they are and move them to correct positions later.
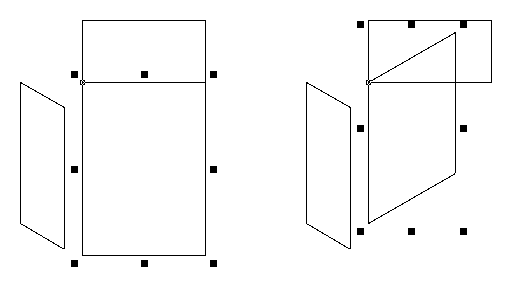
Similarly, apply the Top command. Select the upper right rectangle and select Script / Equal-Area Projection / Top from the menu.
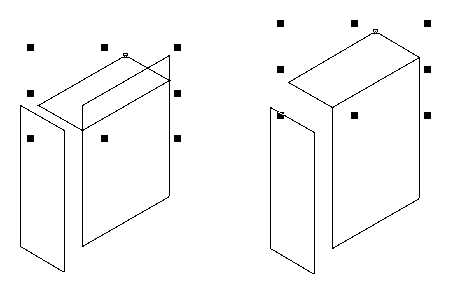
Finally, you arrange the three objects so as to finish the rectangular parallelepiped. Make use of the Snap to Object option again so that the three objects are placed adjacent to each other.
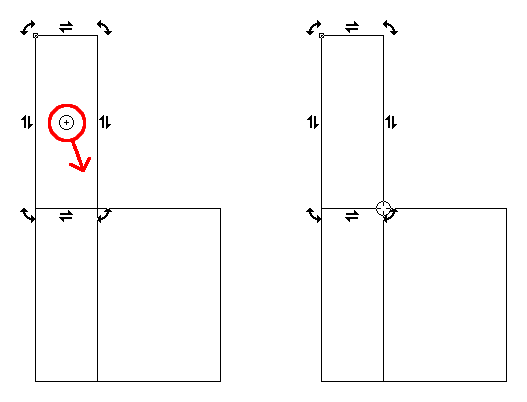
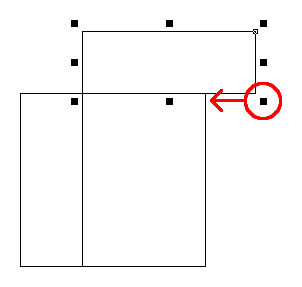
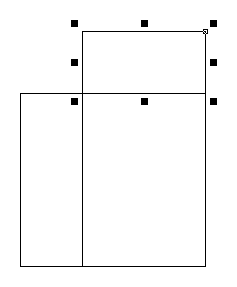
You may run into trouble in making a object snap to a desired position. In that case, first let the object snap to a position somewhere near the desired position and place it there (as shown in the left figure below). Then move the object again, and you would be able to snap it to another object in the desired position (as shown in the right figure below).
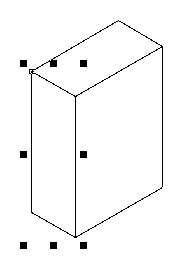
You get the finished artwork if the three objects perfectly meet side by side.
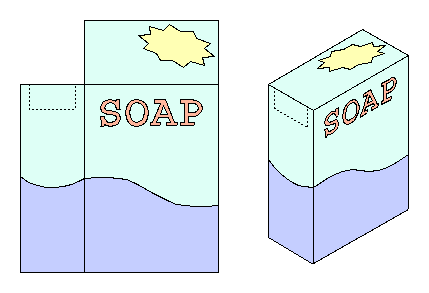
Draw details in the three surfaces of a rectangular parallelepiped before applying the equal-area projection script, and you can get a drawing like a package of detergent shown below. If each surface is grouped before transformation, relative positions of the objects in the group will be preserved after the transformation. Text objects have to be converted to curve objects before the transformation.
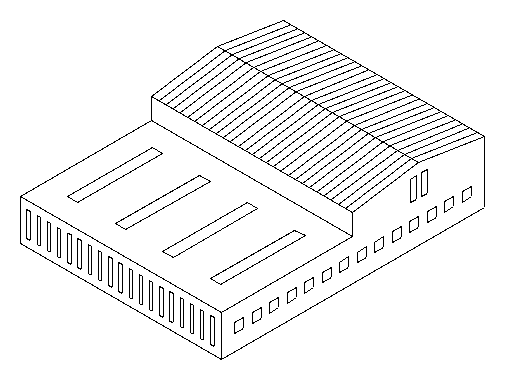
Objects to be transformed don't have to be a rectangle. Like the wider wall of a building shown below, non-rectangular objects can be transformed regularly. However, the equal-area projection script cannot be used to create a surface that is neither vertical nor horizontal in three-dimensional space, such as the roof of the building, because it is difficult to draw the corresponding object to be transformed. Such a slant surface needs to be added afterward based on other vertical or horizontal surfaces using the Snap to Object option.
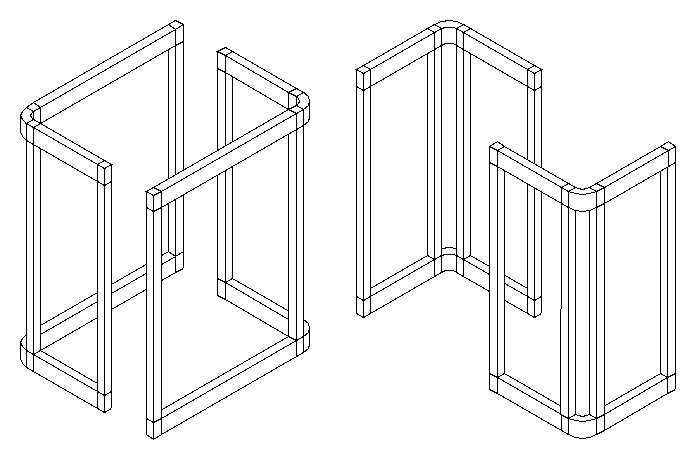
By applying the equal-area projection script to a lot of small parts and combining them, you can relatively easily draw a detailed and complex drawing like the example shown below.