LINUX USB 起動方法 #3

● (No.916-c) LINUX USB 起動方法 #3 (2019年1月28日)
------------------------------------------------
[GNURadio 3.7.13.4 building]
gr-satellites は、GNURadio Ver 3.7.12以上で動作することが判明した。
そこで改めて、最新の Ver 3.7.13.4 を、手動でビルドすることにした。
同梱のマニュアルに従う。>Tnx. JH4XSY
1. Download and Unzip gnuradio-3.7.13.4.tar.gz
http://github.com/gnuradio/gnuradio/releases
2. Install PyBOMBS
$ git clone https://github.com/gnuradio/pybombs.git
$ cd pybombs
$ sudo apt install python-pip
$ sudo python setup.py install
3. Add PyBOMBS recipes
$ pybombs recipes add gr-recipes git+https://github.com/gnuradio/gr-recipes.git
$ pybombs recipes add gr-etcetera git+https://github.com/gnuradio/gr-etcetera.git
4. Configure an installation prefix
$ cd
$ mkdir prefix
$ cd prefix
$ mkdir default
$ cd
$ cd pybombs
$ pybombs prefix init ~/prefix/default/
5. Install GNURadio (long time to install)
$ cd
$ pybombs install gnuradio
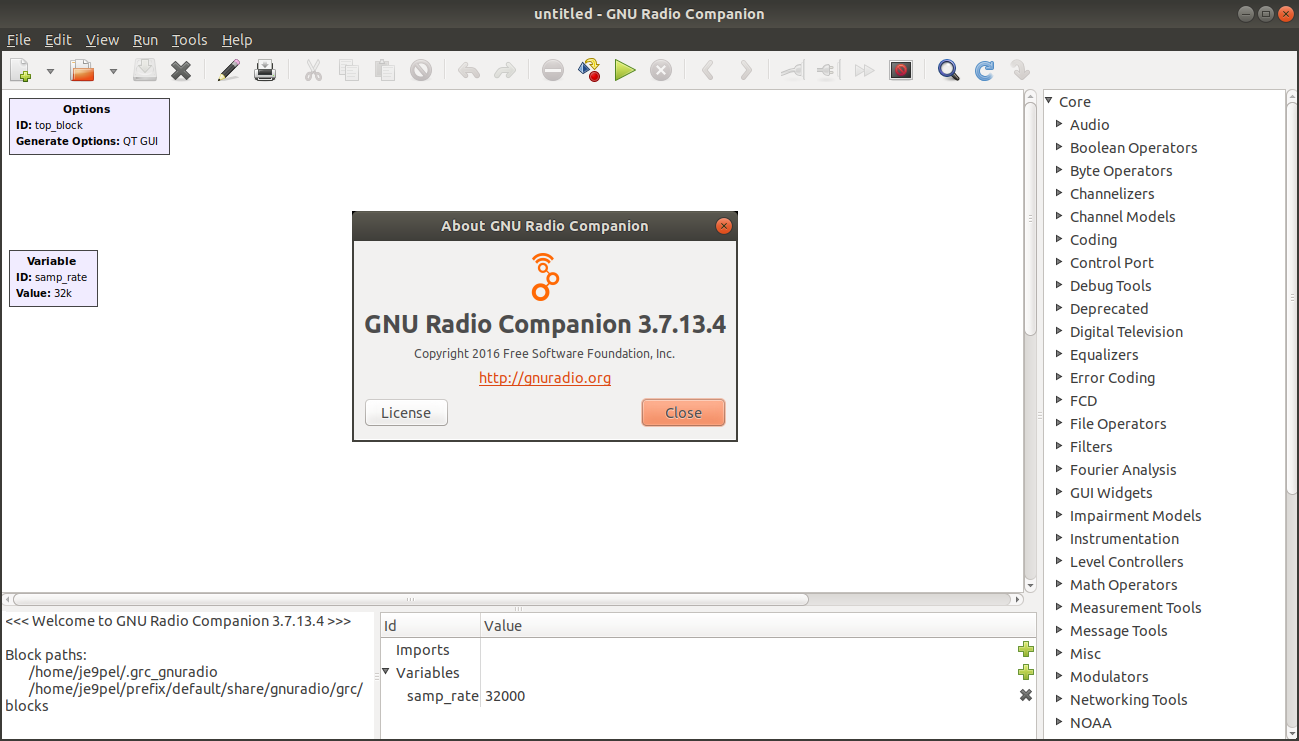
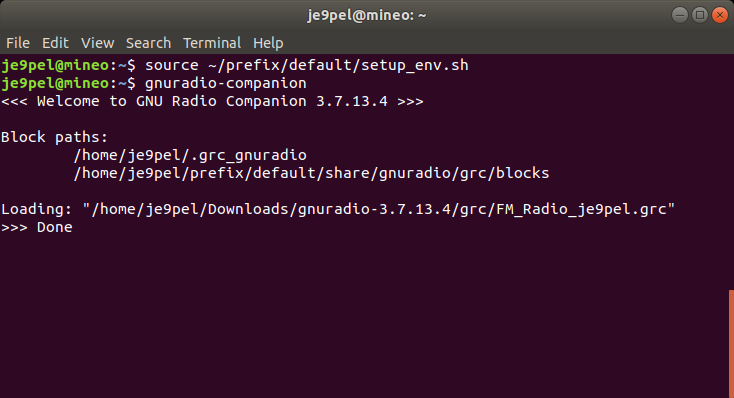
6. Run GNURadio Companion from a new prefix
$ cd
$ source ~/prefix/default/setup_env.sh
$ gnuradio-companion
or execute it without changing the current environment,
$ pybombs run gnuradio-companion
上記 1.~6. でインストールできない場合は、次の 7. を行う。
7. $ rm -rf .pybombs
$ rm -rf ./prefix
$ git clone https://github.com/gnuradio/pybombs.git
$ cd pybombs
$ sudo apt install python-pip
$ sudo python setup.py install
$ pybombs recipes add gr-recipes git+https://github.com/gnuradio/gr-recipes.git
$ pybombs recipes add gr-etcetera git+https://github.com/gnuradio/gr-etcetera.git
$ mkdir /home/user_name/prefix
$ pybombs config --package gnuradio gitrev v3.7.13.4
$ pybombs prefix init /home/user_name/prefix/default -a myprefix -R gnuradio-default
$ gnuradio-companion
あるいは、シンプルに
Extract gnuradio-3.7.13.4.tar.gz
$ cd gnuradio-3.7.13.4
$ mkdir build
$ cd build
$ cmake ../
$ sudo make
$ sudo make test
$ sudo make install
$ sudo ldconfig
$ gnuradio-companion
[Hierarchichal flowgraphs compiling]
GNURadio の起動時に、Faild to load module "caberra-gtk-module"
というエラー表示が何度も出て気になる。次のようにして解消した。
8. $ sudo apt-get install --reinstall libcanberra-gtk-module
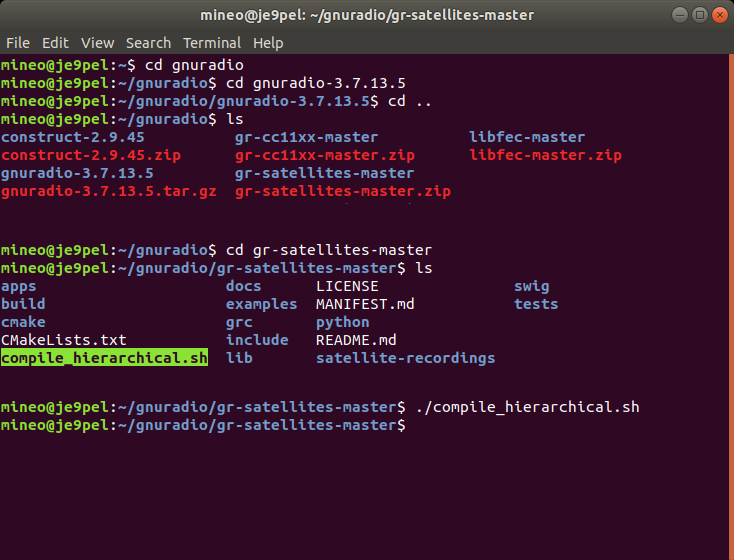
いよいよ、compile_hierarchical.sh のコンパイルの実行を行おうと思う。
ところが、'apps/hierarchical/ccsds_descrambler.grc' が見つからない
という表示がこれも何度も出る。これは、"/gnuradio-3.7.13.4"フォルダ
の下に "apps/hierarchical"フォルダを mkdirコマンドで作成して、その
中に ccsds_descrambler.grc を置いてからコンパイルして解決した。(*)
9. Make subfolder /apps/hierarchical in "gnuradio-3.7.13.4" folder
10. Paste "ccsds_descrambler.grc" in this subfolder
11. $ cd gnuradio-3.7.13.4
12. $ ./compile_hierarchical.sh
(*) Hierarchichal について、後日この方法で再構築しようとした際に
うまくコンパイルできなかったので、次図中央のようにして "gr-
satellite-master"フォルダー内にある "compile_hierarchical.sh"
を用いてコンパイルした。

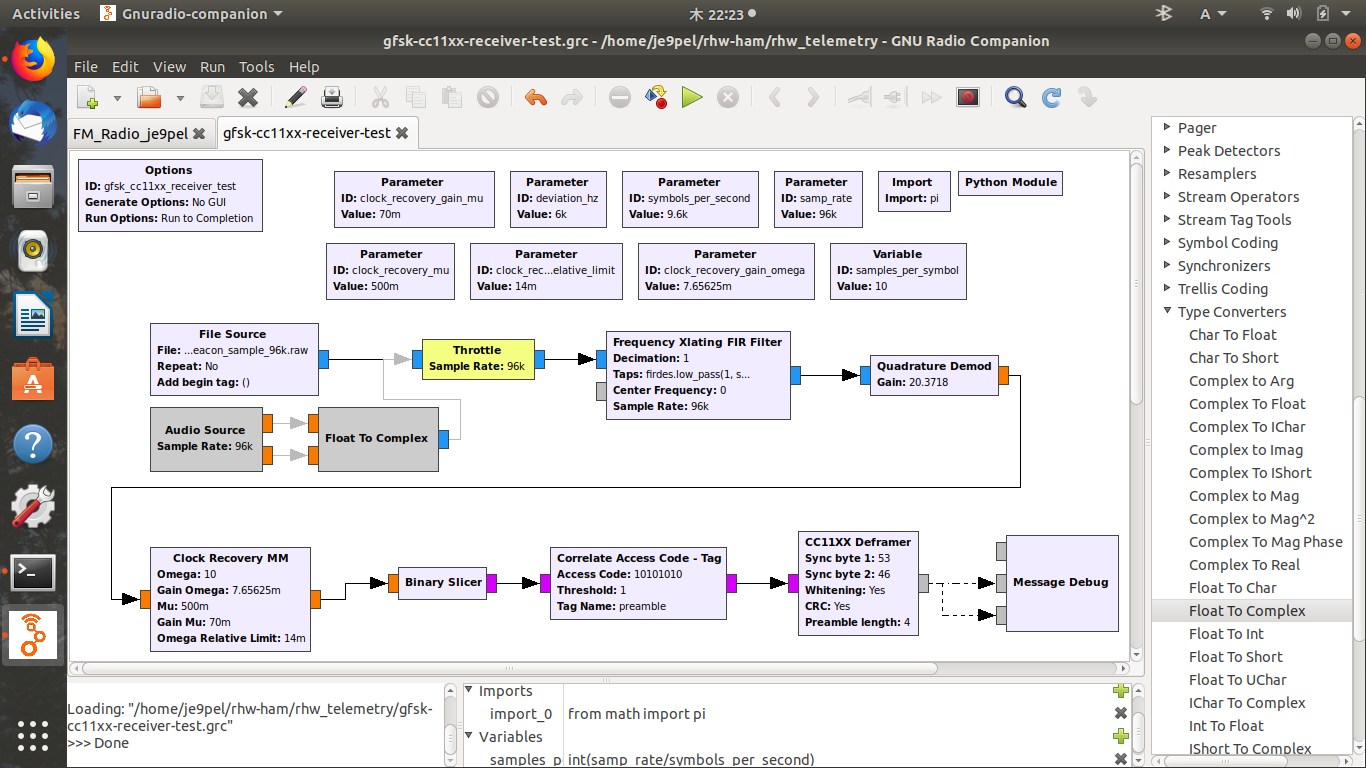
 [gfsk-cc11xx-receiver-test.grc loading]
次に、"gfsk-cc11xx-receiver-test.grc" を GNURadio に読み込ませた時
に、図中① "cc11xx_cc11xx_deframer_bb" が見つからない、というエラー
表示と共に、GRC画面の中のその箇所のボックスが赤く表示されてしまう。
これは、以前ダウンロードしておいた gr-cc11xxフォルダの中でいったん
cmakeした上で、grc-cc11xx/grc の中の "cc11xx_cc11xx_deframer_bb.xml"
ファイルを、home/prefix/default/share/gnuradio/grc/blocks フォルダ
の中にコピーしてから、上記.grcをロードすると、図中②のようにエラー
表示は出ずに、該当のボックスも黒く正しく表示されるようになった。
※ この件は、次の手順を踏むと自動的に処理される。
13. $ cd gr-cc11xx
14. $ mkdir build
15. $ cd build
16. $ cmake ../
17. $ make
18. $ sudo -s
19. # make install
20. # exit
21. $ sudo ldconfig
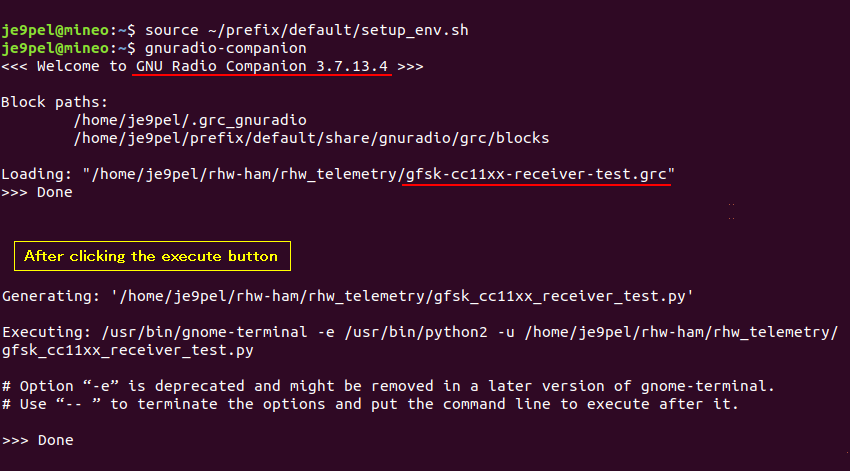
GNURadioに読み込まれた "gfsk-cc11xx-receiver-test.grc" を、GRC画面
上段の△ボタンを押して実行しようとすると、今度は図中③の表示が出て
停止してしまう。これはまだ解決していない。→ Option "-e" deprecated
[gfsk-cc11xx-receiver-test.grc loading]
次に、"gfsk-cc11xx-receiver-test.grc" を GNURadio に読み込ませた時
に、図中① "cc11xx_cc11xx_deframer_bb" が見つからない、というエラー
表示と共に、GRC画面の中のその箇所のボックスが赤く表示されてしまう。
これは、以前ダウンロードしておいた gr-cc11xxフォルダの中でいったん
cmakeした上で、grc-cc11xx/grc の中の "cc11xx_cc11xx_deframer_bb.xml"
ファイルを、home/prefix/default/share/gnuradio/grc/blocks フォルダ
の中にコピーしてから、上記.grcをロードすると、図中②のようにエラー
表示は出ずに、該当のボックスも黒く正しく表示されるようになった。
※ この件は、次の手順を踏むと自動的に処理される。
13. $ cd gr-cc11xx
14. $ mkdir build
15. $ cd build
16. $ cmake ../
17. $ make
18. $ sudo -s
19. # make install
20. # exit
21. $ sudo ldconfig
GNURadioに読み込まれた "gfsk-cc11xx-receiver-test.grc" を、GRC画面
上段の△ボタンを押して実行しようとすると、今度は図中③の表示が出て
停止してしまう。これはまだ解決していない。→ Option "-e" deprecated

 [gr-satellites, gr-ax25, gr-kiss, gr-display, gr-ec, etc.]
上記に加え、gr-frontends と gr-gpredict-doppler もダウンロードした。
これからビルドして、使い方を調べる。さらに、gr-satellites サイトの
Dependencies の項に書かれている、libfec, construct, requests, feh
を全てインストールした。時に権限を上げて、 $ sudo -s -> # ~ 等と
して作業する必要があった。(Apr-May 2019)
[gr-satellites, gr-ax25, gr-kiss, gr-display, gr-ec, etc.]
上記に加え、gr-frontends と gr-gpredict-doppler もダウンロードした。
これからビルドして、使い方を調べる。さらに、gr-satellites サイトの
Dependencies の項に書かれている、libfec, construct, requests, feh
を全てインストールした。時に権限を上げて、 $ sudo -s -> # ~ 等と
して作業する必要があった。(Apr-May 2019)


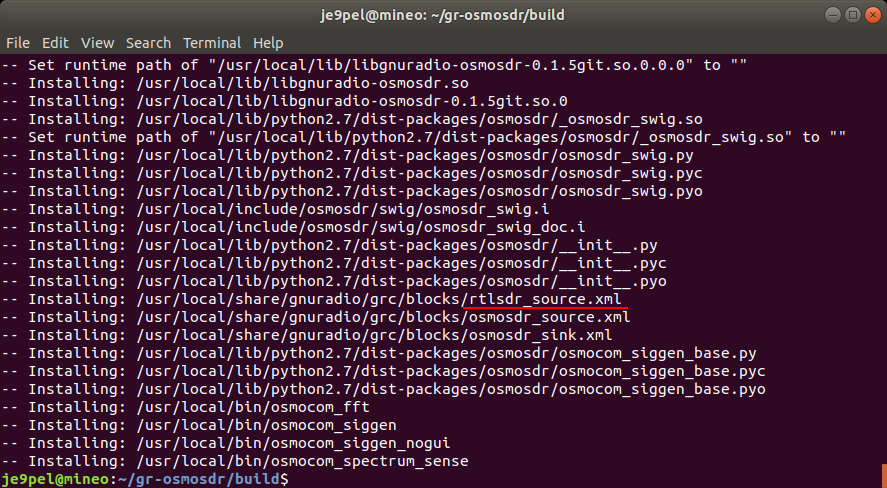
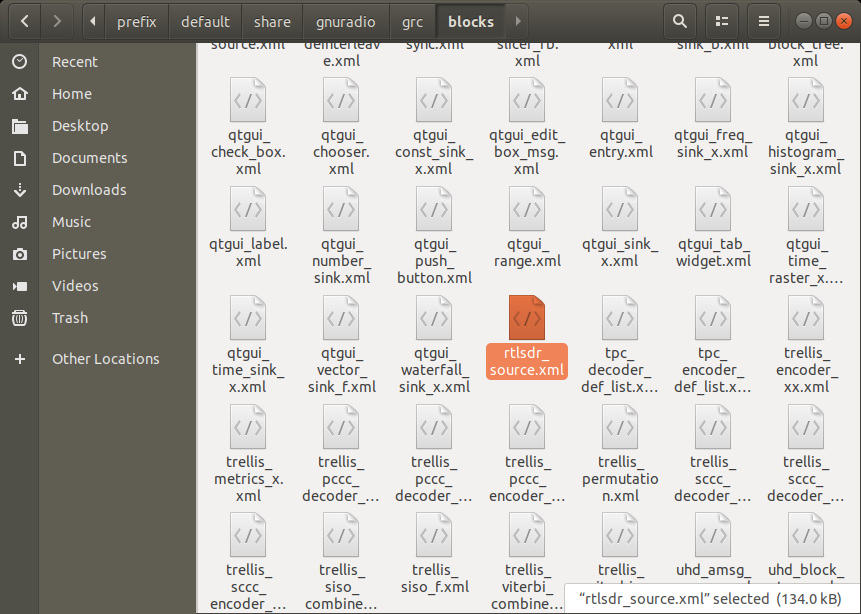
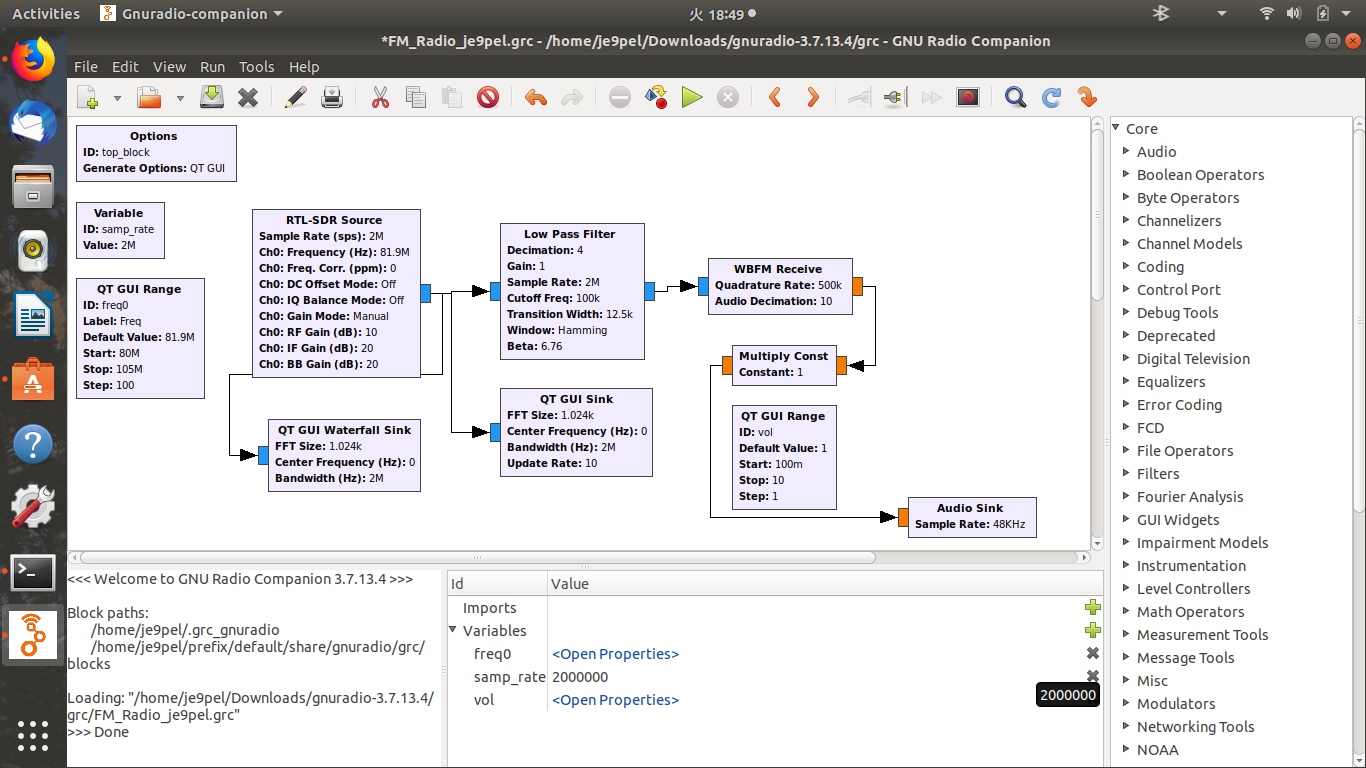
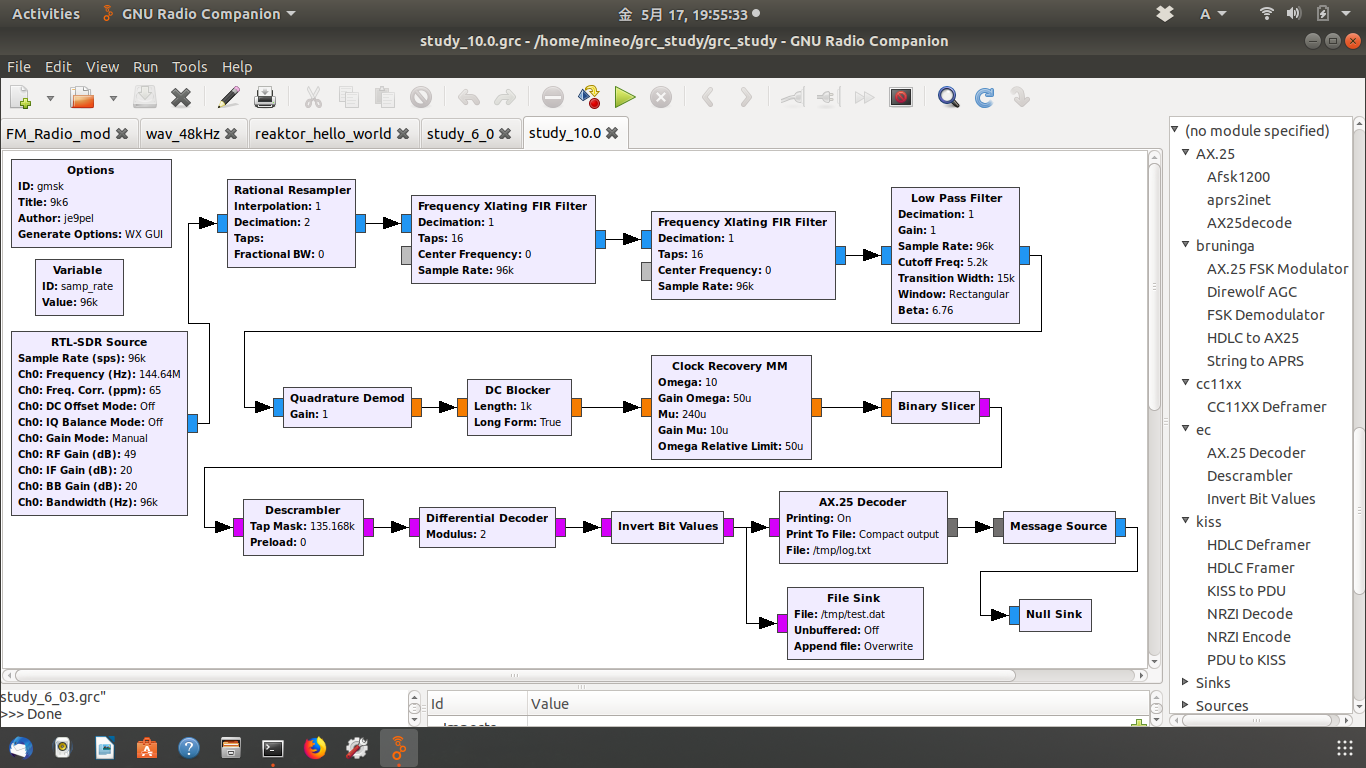 [rtlsdr_source.xml re-installing]
以前、何でもなく出来ていた FM_Radio_mod.grc (FM_Radio.grc 改良版) が起動
しなくなった。理由は、ブロックの一つ RTL-SDR Source (rtlsdr_source.xml)
が、 /prefix/default/share/gnuradio/grc/blocks 内に存在していないことで
あることが Terminal の軌跡からわかった。 この rtlsdr_source.xml について
随分苦労したが、gr-osomosdr を再インストールして、生成された xmlファイル
を、所定の場所にコピーすることで解決した。
22. $ apt-get remove gr-osmosdr
23. $ git clone git://git.osmocom.org/gr-osmosdr
24. $ cd gr-osmosdr/
25. $ mkdir build
26. $ cd build/
27. $ cmake ../
28. $ make
29. $ sudo make install
30. $ sudo ldconfig
31. $ cp /usr/local/share/gnuradio/grc/blocks/rtlsdr_source.xml
/home/je9pel/prefix/default/share/gnuradio/grc/blocks
(/home/je9pel/gnuradio/gnuradio-3.7.13.4/grc/blocks)
[rtlsdr_source.xml re-installing]
以前、何でもなく出来ていた FM_Radio_mod.grc (FM_Radio.grc 改良版) が起動
しなくなった。理由は、ブロックの一つ RTL-SDR Source (rtlsdr_source.xml)
が、 /prefix/default/share/gnuradio/grc/blocks 内に存在していないことで
あることが Terminal の軌跡からわかった。 この rtlsdr_source.xml について
随分苦労したが、gr-osomosdr を再インストールして、生成された xmlファイル
を、所定の場所にコピーすることで解決した。
22. $ apt-get remove gr-osmosdr
23. $ git clone git://git.osmocom.org/gr-osmosdr
24. $ cd gr-osmosdr/
25. $ mkdir build
26. $ cd build/
27. $ cmake ../
28. $ make
29. $ sudo make install
30. $ sudo ldconfig
31. $ cp /usr/local/share/gnuradio/grc/blocks/rtlsdr_source.xml
/home/je9pel/prefix/default/share/gnuradio/grc/blocks
(/home/je9pel/gnuradio/gnuradio-3.7.13.4/grc/blocks)

 [GQRX update to Ver 2.11.5]
32. http://gqrx.dk/download/install-ubuntu
33. $ sudo apt-get purge --auto-remove gqrx
34. $ sudo apt-get purge --auto-remove gqrx-sdr
35. $ sudo apt-get purge --auto-remove libgnuradio*
36. $ sudo add-apt-repository -y ppa:bladerf/bladerf
37. $ sudo add-apt-repository -y ppa:myriadrf/drivers
38. $ sudo add-apt-repository -y ppa:myriadrf/gnuradio
39. $ sudo add-apt-repository -y ppa:gqrx/gqrx-sdr
40. $ sudo apt-get update
41. $ sudo apt-get install gqrx-sdr
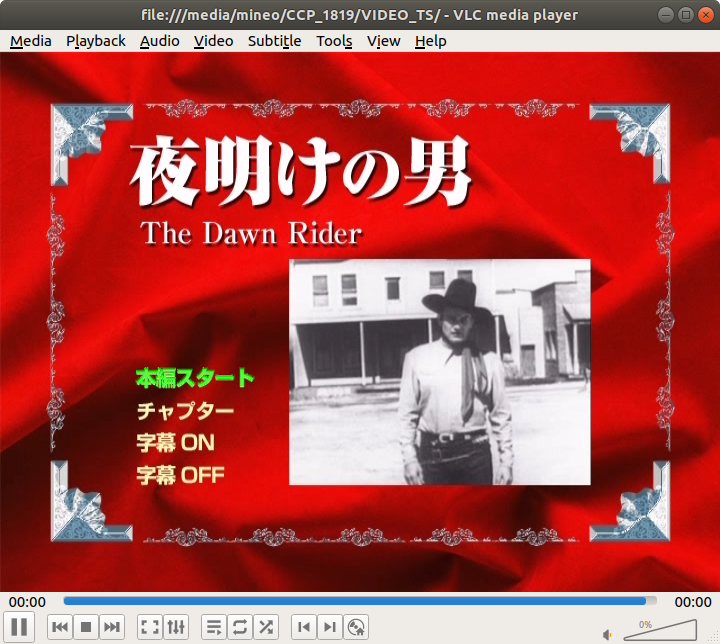
[VLC Media Player installing in LINUX]
42. http://www.hiro-log.net/entry/2017/09/26/222520
43. $ sudo apt-get install vlc
44. $ sudo dpkg --configure -a
45. $ sudo apt install libdvd-pkg
46. $ sudo dpkg-reconfigure libdvd-pkg
47. Select VIDEO_TS.IFO in VLV Media Player
[GQRX update to Ver 2.11.5]
32. http://gqrx.dk/download/install-ubuntu
33. $ sudo apt-get purge --auto-remove gqrx
34. $ sudo apt-get purge --auto-remove gqrx-sdr
35. $ sudo apt-get purge --auto-remove libgnuradio*
36. $ sudo add-apt-repository -y ppa:bladerf/bladerf
37. $ sudo add-apt-repository -y ppa:myriadrf/drivers
38. $ sudo add-apt-repository -y ppa:myriadrf/gnuradio
39. $ sudo add-apt-repository -y ppa:gqrx/gqrx-sdr
40. $ sudo apt-get update
41. $ sudo apt-get install gqrx-sdr
[VLC Media Player installing in LINUX]
42. http://www.hiro-log.net/entry/2017/09/26/222520
43. $ sudo apt-get install vlc
44. $ sudo dpkg --configure -a
45. $ sudo apt install libdvd-pkg
46. $ sudo dpkg-reconfigure libdvd-pkg
47. Select VIDEO_TS.IFO in VLV Media Player
 トップ へ戻る.
 LINUX #2 へ戻る.
 ホームページ(目次) へ戻る.