
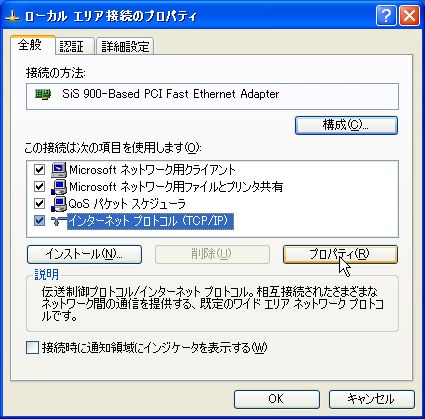
Windows95,98マシンの設定
ネットワーク プロトコル は、TCP/IP・ネットワークプ
ロトコルのインストール
コントロールパネル の
ネットワークをダブルクリック
ネットワークの設定 で 追加を
クリック
プロトコル をダブルクリック
Microsoft をクリックし、NetBEUI をクリックし、
OK クリック
同じくTCP/IP をクリックし、OK クリック
識別情報タグをクリッ
ク
コンピュータ名 taka (takaの場合)
ワークグループ hosoyama
ドライブ(C,D等)
(マイコンピュータ、ドライブのプロパティにある)の共有設定
マイコンピュータをダブルク
リック
ドライブ(C,D等)を右ク
リック、プロパティ選択
共有を有効 にする
パスワードで区別を選択、パ
スワード入力
OK
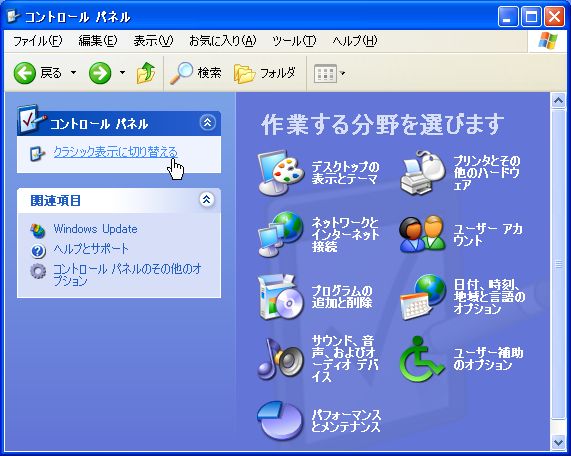
WindowsXP_Homeマシンの設定
Linuxマシンの設定
ネットワークカードドライバのインストール
(自動認識されなかった場合)
NE2000互換PCIカードの例
/etc/modules.conf
の編集・保存 (TL6.0から modules.conf になりました)
rootで loginするか、 su コマンドでスーパーユーザーになる。
viエディタまたはemacsで modules.conf を開き
alias eth0 ne2k-pci
を追加・保存する。
再起動
Sambaのインストール
殆どのディストリビューションのCDROMにはSambaが収録されています。
フルインスールするか、カスタムでSambaを指定してインストールしていれば、
Sambaサーバーを起動するだけになっているはずです。
もし後でインストールする場合は、
rootでLoginするか、suでスーパーユーザーになり、
(TurboLinuxの場合)
/usr/sbin/turbopkg −−コンソールから実行する場合
以上のコマンドにてRPMパッケージ管理アプリケーションを起動し、
smbをインストールする。
smb.confファイルの設定
smb.confファイルのある場所は、TurboLinux
8 Serverの場合
/etc/samba の下にあります。
TurboLinux 8 Server になりディレクトリ構造が変更になりました。
/etc/smb.conf → /etc/samba/smb.conf
実際にある雛型ファイルは、結構長いテキストファイルですが、
殆どがコメントであったりコメントアウト(行頭が「#」または「;」)されており、
設定する個所は意外と少ないです。
viエディタまたは emacsなどを使用し変更追加・保存します。
以下にken のユーザー・ネット設定とsmb.confファイルを示します。
| windowsネットワークユーザー(コンピューター名)の登録
rootで loginするか、 su コマンドでスーパーユーザーになる #useradd taka /usr/sbin/turbonetcfg を実行し、ネットワークの設定 /etc/samba/smb.conf ファイルを編集・保存 [global] coding system = euc client code page = 932 workgroup = hosoyama server string = %L: ken %v on %h security = user encrypt passwords = Yes smb passwd file = /etc/samba/smbpasswd passwd program = /usr/bin/passwd %u ; passwd chat = *New*password* %n\n *Re*new*password* %n\n *success* ; unix password sync = Yes log file = /var/log/samba/log.%m max log size = 50 deadtime = 15 read size = 65536 socket options = TCP_NODELAY SO_RCVBUF=8192 SO_SNDBUF=8192 add user script = /usr/sbin/useradd %u lm announce = False dns proxy = No ; wins support = Yes dos filetimes = Yes dos filetime resolution = Yes printing = cups printer admin = administrator winbind uid = 10000-20000 winbind gid = 10000-20000 -------------------------------------------------------- [printers] comment = All Printers path = /var/spool/samba printable = Yes browseable = No smb passwd file = /etc/samba/smbpasswd [homes] comment = %S's Home Directories read only = No browseable = No [PUBLIC] comment = Public Space for Everyone path = /var/samba/public read only = No force create mode = 0666 force directory mode = 0777 guest only = Yes guest ok = Yes [PRINT$] comment = Printer Driver for Windows 9x/Me/NT/2000/XP path = /var/samba/printer admin users = administrator write list = administrator guest ok = Yes [NETLOGON] comment = Script for Domain Logon path = /var/samba/netlogon admin users = administrator write list = administrator guest ok = Yes [SAMBADOC] comment = Samba Documents path = /usr/share/doc/packages/samba-2.2.4/docs/ guest ok = Yes [CDROM] comment = CD-ROM path = /mnt/cdrom guest ok = Yes root preexec = /var/samba/bin/cdmount %P %S %m %I root postexec = /var/samba/bin/cdmount %P %S %m %I /off [Share HD] comment = / path = / pablic = no writable = no printable = no createmask = 0765 smb passwd file = /etc/samba/smbpasswd
|
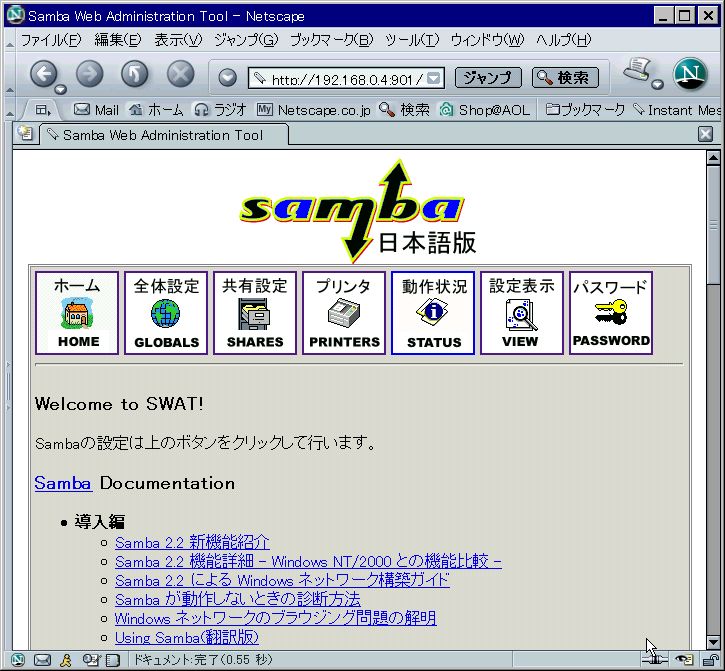
Swatの設定
/etc/xinetd.d/swatファイルの設定
| # default: off # description: SWAT (Samba Web Administration Tool) # securlevel: 10 service swat { disable = no ---------- disableをnoにする port = 901 socket_type = stream protocol = tcp wait = no user = root server = /usr/sbin/swat } |
/etc/hosts.denyファイルの設定
| # # hosts.deny This file describes the names of the hosts which are # *not* allowed to use the local INET services, as decided # by the '/usr/sbin/tcpd' server. # # See man hosts_access(5) for more information. ALL: ALL ---------- 確認する |
| # # hosts.allow This file describes the names of the hosts which are # allowed to use the local INET services, as decided # by the '/usr/sbin/tcpd' server. # # See man hosts_access(5) for details. # # The settings in /etc/hosts.allow take precedence over the those in # /etc/hosts.deny. # # Note: The tcp_wrappers (configured by /etc/hosts.allow and /etc/hosts.deny) # only affect services that are called via /usr/sbin/tcpd. Check out # /etc/inetd.conf to find out if a service started by inetd goes through # tcp_wrappers. # Some services are not started via inetd and still use # tcp_wrappers (e.g. sshd, portmap (NFS) -- see below for sample setups). # # Examples of services which usually run as stand alone servers and # don't make use of tcp_wrappers are Apache and Sendmail. # # Note2: Security scanners like nmap(1) will report blocked services as being # open, because an initial connection is always established and only # dropped later, if the connection is not approved by the tcp_wrappers # configuration. ################################################################################ # Local host # Allow all requests from localhost ALL : 127.0.0.1 ################################################################################ # Telnet # Allow telnet logins from sample.foobar.edu # Warning: telnet is inherently insecure as a protocol. All network traffic, # including authentication information (login and password) are transmitted # as clear text. Use secure alternatives (e.g. ssh). #in.telnetd: sample.foobar.edu ################################################################################ # ProFTP (standard TurboLinux ftp server) # Allow proftpd (TurboLinux default ftp daemon) logins from sample.foobar.edu # Warning: the authentication information for ftp goes as clear text over # the net. This is especially dangerous if the same login/password combination # can be used for any shell logins (telnet, ssh). Make sure remote ftp users # don't have a shell login. #in.proftpd: 192.168.0 ################################################################################ # Portmap (required for an NFS server) # Allow connects to portmap from sample.foobar.edu. This is required if you # want to provide NFS services. #portmap: sample.foobar.edu ################################################################################ # ssh # Allow connets to sshd from sample.foobar.edu. #sshd: sample.foobar.edu ################################################################################ # pop # Allow connets to ipop3d from sample.foobar.edu. #in.ipop3d: 192.168.0 ################################################################################ # Allow all requests from hosts in .foobar.edu with one exception (notice the # leading dot) #ALL: .foobar.edu EXCEPT terminalserver.foobar.edu sshd : ALL swat : 192.168.0.0/255.255.255.0 :allow ------------追加する ipop3d :192.168.0.0/255.255.255.0 :allow |
Samba、Xinetd、Swat デーモンの起動
/usr/sbin/turboservice を実行
smb、xinetd、swat
を起動時に有効にする。
上記デーモンを起動する。
 |
パスワードをクリックし、 ローカルマシンのパスワード管理で ユーザー名、新パスワード、新パスワード再入力を入力し、新規ユーザー追加を する。 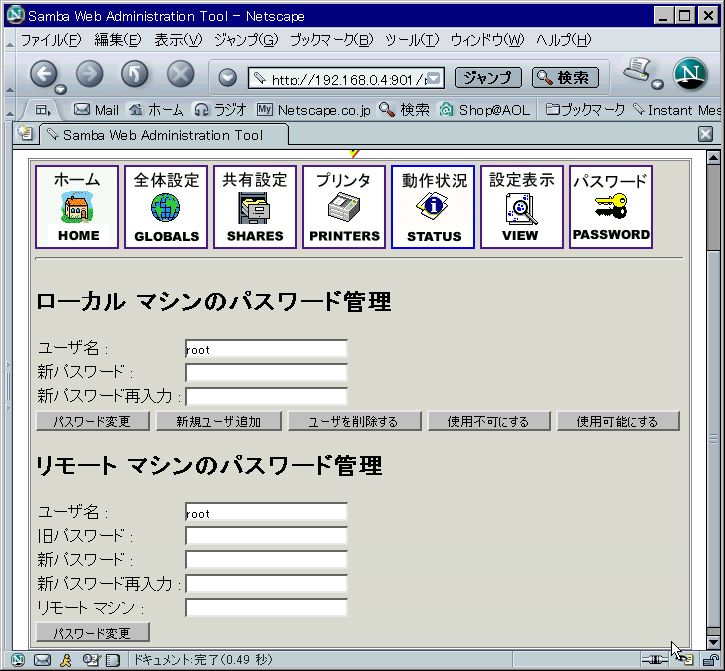 |
